A FrankenPad Story: T25 with Quad-Core CPU and UHD LCD Panel

I like T25. Although, it wasn’t the ThinkPad of a dream, and its placement as a retro ThinkPad sounds ridiculous and frustratingly, for me it was the best modern ThinkPad to get in 2017. All I wanted is a 7-row keyboard with modern hardware.
However, T25 was available only in a single configuration. Buying T25, you’ll get an awful FHD touch panel with low viewing angles, low gamut, low brightness, and with PWM of course. Moreover, if you try to increase the PWM frequency, it will produce high pitch noise!
T25 has 940MX discrete GPU. It wasn’t so necessary to me, and I was ready to live with it… But then
I found 940MX disabled via bbswitch (this driver allows to disable NVIDIA video cards on Linux)
produces high pitch noise as well! I didn’t want my battery to drain from discrete GPU when I don’t
need it, so I even made a script which disables the GPU when the notebook is not charging, so I
didn’t suffer from high pitch sound at home and got a good battery life outdoors at the same time.
And then I faced the fact how good NVIDIA drivers at Linux: after some cycles of enabling and
disabling the GPU I wasn’t able to remove nvidia module from the kernel anymore, thus I was unable
to disable the GPU without rebooting the machine. I decided that getting 940MX was a really bad idea
and I did’t want to deal with NVIDIA anymore, but did I have a choice?
T25 is based on T470. Basically, T25 is a T470 in almost the best configuration and 7-row keyboard. Actually, it isn’t. There were more premium T470 available with magnesium lids! These lids were significantly lighter and probably sturdier. But for some reason T25 were equipped with regular PPS lids. What an absurd saving on 25th anniversary notebook!
The last problem is the CPU. I can understand it: ThinkPad is a business line, and there were no business notebooks with quad-core ULV CPUs available in October 2017… But I wanted a quad-core CPU. Especially I wanted it from the notebook I’m getting for years ahead.
And then 2018 happened. Lenovo updated their product line with new notebooks, replacing old T470 with new T480. There were not so many changes in chassis between them, but T480 had quad-core CPU and it also was able to run QHD LCD panels since T480’s eDP connector has 4 lanes instead of 2 in T470. I started to wonder whether it’s possible to get T480’s system board and install it into my T25. And here my story begins.
Gathering the Information
The first significant step was done when I was able to meet my friend and connect my T25’s keyboard to his T480. Connectors are the same, but keyboards have different size, as well as top cases. Some fn-keys didn’t work well, some of them were completely dead. But I was fine with this: I was sure that I will be able to remap some of these keys under Linux without even patching the EC (embedded controller).
System Board Mod
What do I need the create the FrankenPad besides the system board? The system board is connected to the top case using the brackets. The updated ports are available through the bottom cover, so the bottom cover from T480 should be used as well. Since 7-row keyboard takes more place than 6-row one, I decided to use T25’s top case so the keyboard could physically fit.
But T25’s top case was not designed for T480’s system board. The old docking connector was removed from T480. Also T480 has different ports on the left side. This means that I had to modify T25’s top case somehow so it could accommodate T480’s system board. And I wasn’t ready to do this with my top case: I decided to get a spare part.
So, in my case, I had a T25 and wanted to install T480’s system board there. In this case I need the following parts:
- System board itself
01HX686— Spare top case for T2501YR485— Base cover for T48001YR515— System board brackets and docking port cover
If you already have T480, you can also perform the same mod, but the list of parts is different:
- Keyboard (US ANSI part number is
01HW487) 01HX686— Top case for T2501LV505or01LV506— Touchpad (the one used in T480’s won’t fit since T25’s keyboard takes more place, and trackpoint won’t work without touchpad connected, don’t even ask me why)01HX690— Keyboard cover with power button01HX688or01AV232— Power cable01HX689or01AV233— Power board01HX691— M.2 bracket (there is no 2.5 SATA in T25, but you can mod M.2 bracket yourself)01AX952or01AX953— Hinges (the left hinge has different mount holes)
Magnesium Lid Mod
What about the lid? After some investigations, I understood that PPS and magnesium lids use different bezels. I decided to get the bezel with ThinkShutter (a webcam cover introduced with new ThinkPads) which will be compatible with magnesium lid.
So, the following parts are needed:
01AX955— Magnesium lid01YR490or01YR491— LCD bezel for magnesium lid (with ThinkShutter or with IR camera)
UHD Panel Mod
I also found that T480 uses different LCD connector so I even won’t be able to connect my touch panel without replacing the cable. And then I found that there are 14 inches UHD panels available! However, they were never available for T480. And they have high gamut and high brightness as well. I decided to try to install it, all I needed is a QHD LCD cable for T480 and the panel.
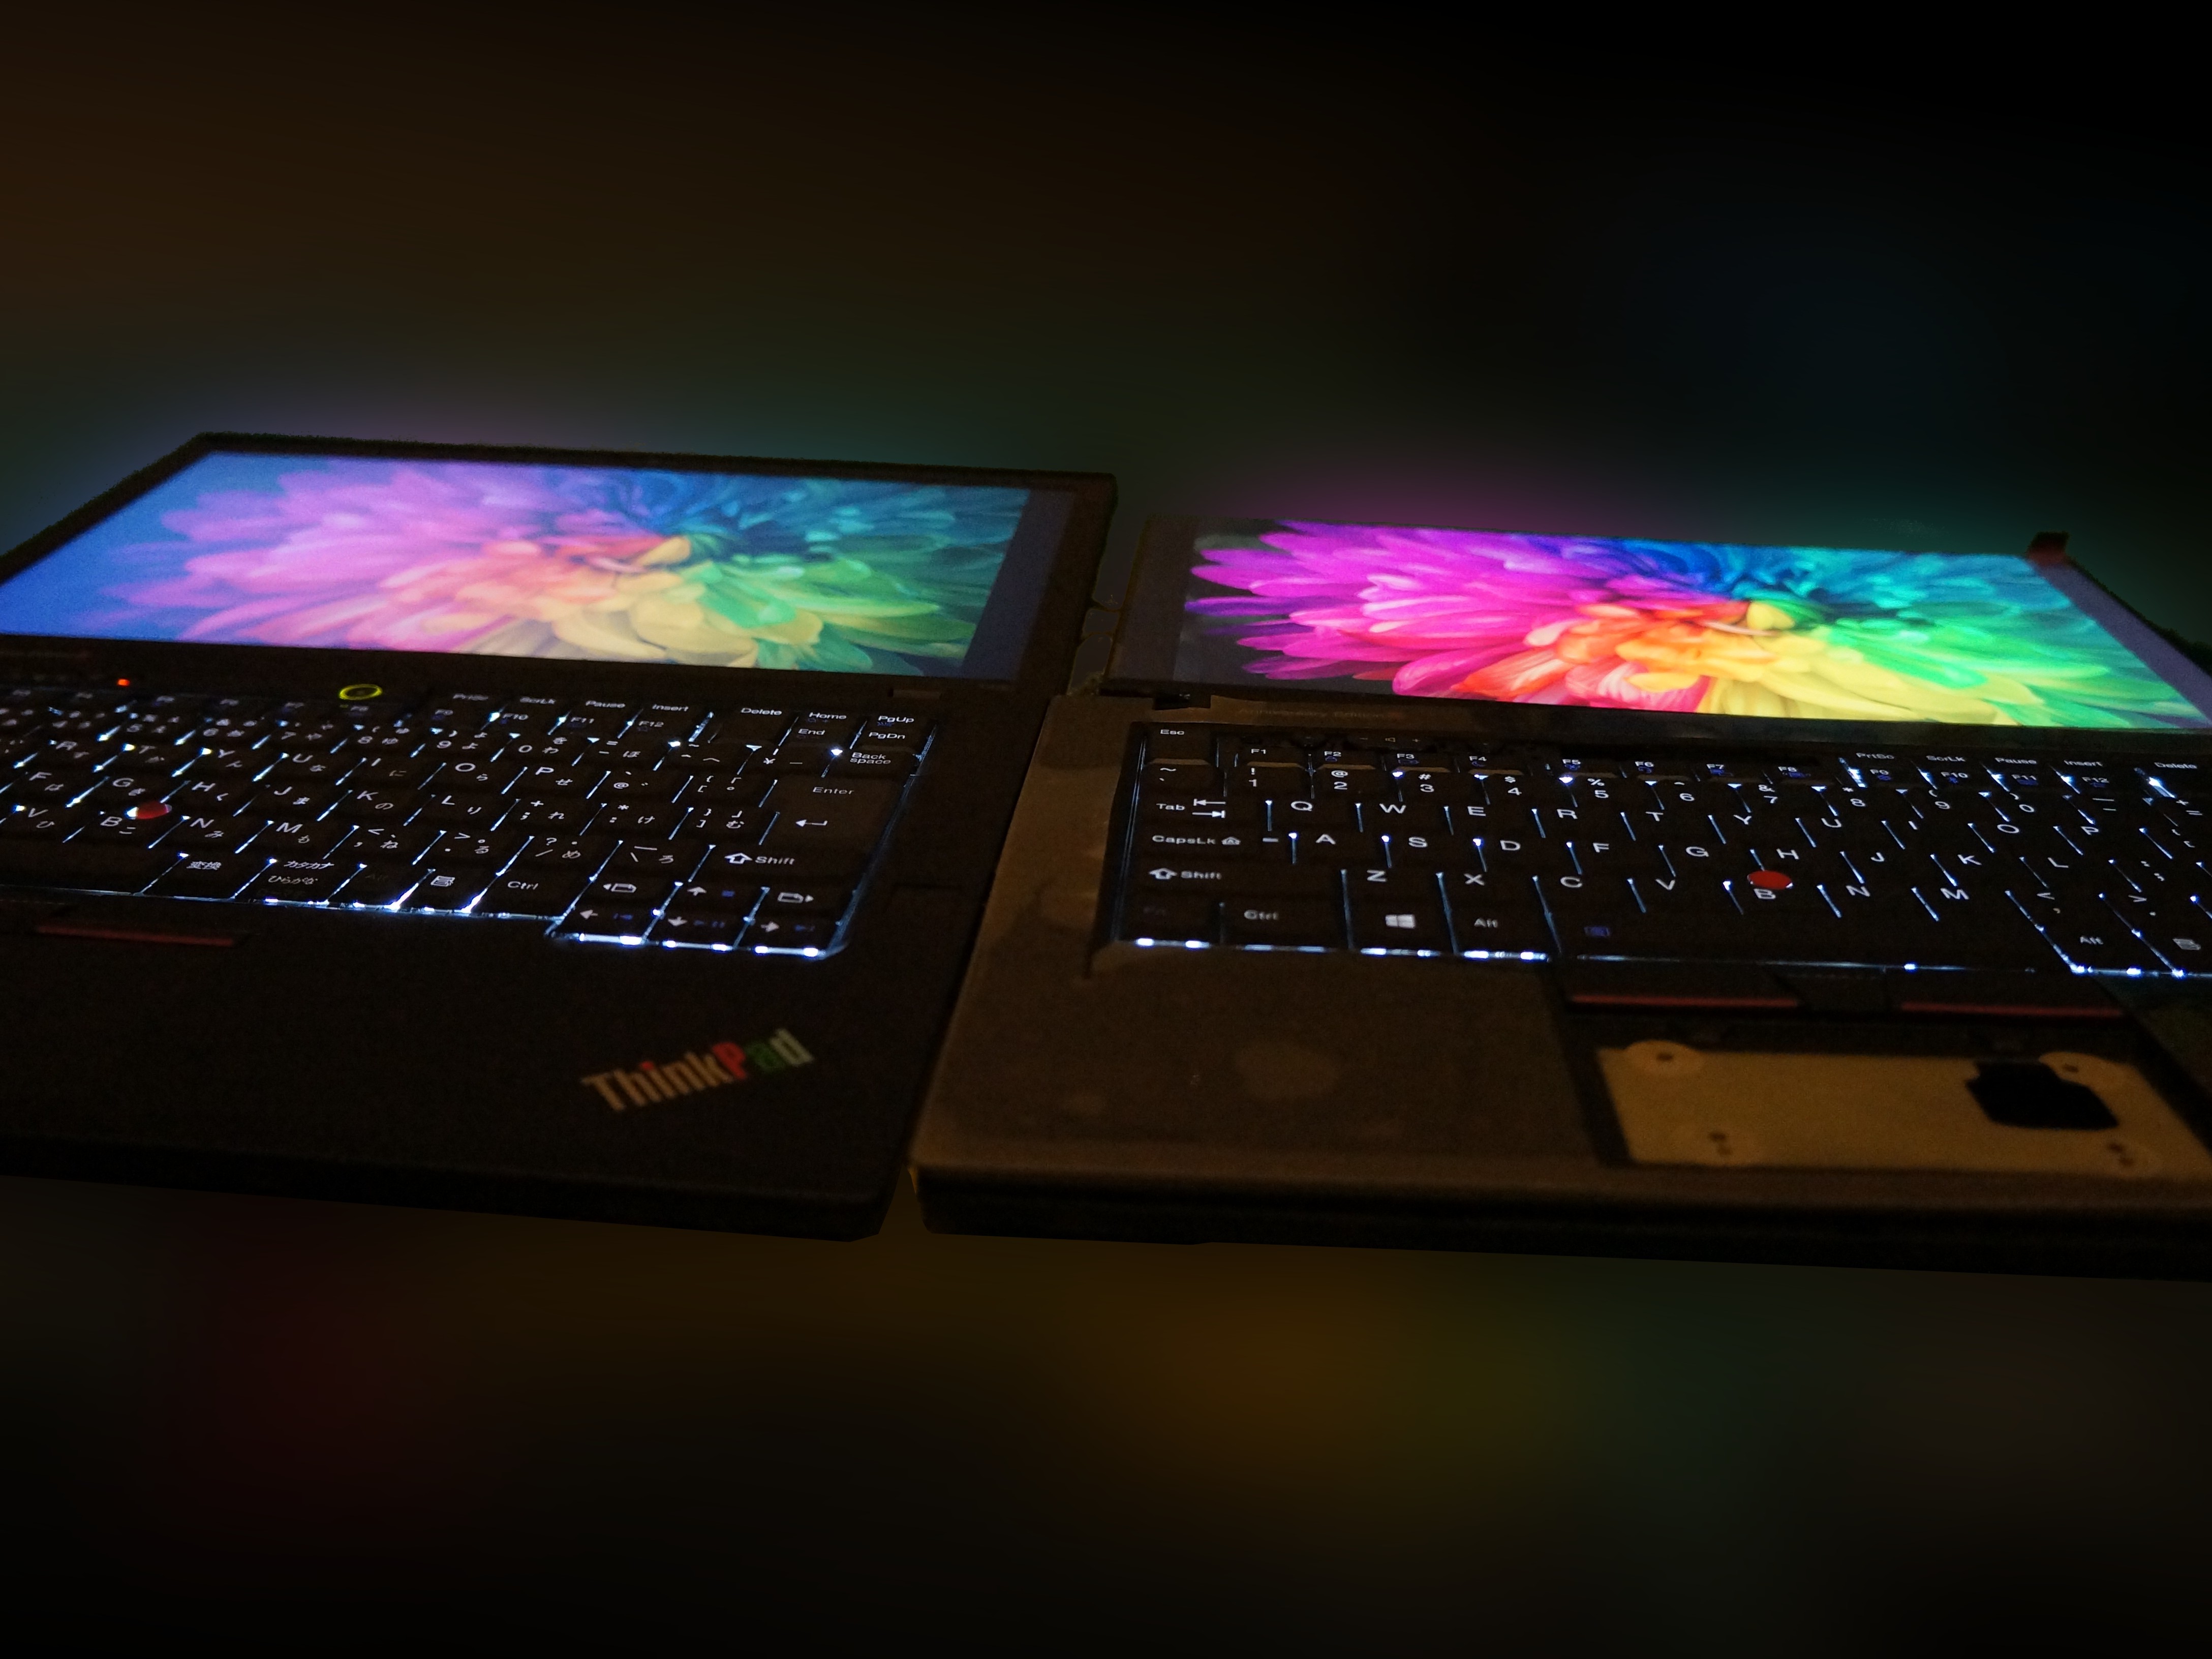
I wasn’t sure that the panel will work, but looking ahead, I can say that it works without any problems both on GNU/Linux and Windows. The panel I chose has 100% sRGB, 400 nit, but it also has PWM. Luckily, I was able to increase the frequency and it didn’t cause the high pitch noise like it was with my FHD touch panel.
- UHD panel (mine is
BOE NV140QUM-N61) 01YR503— QHD LCD cable
Modifying the Top Case
Probably, this part required all diligence I’m capable of. And a dremel, of course.
Removing the Docking Connector and the Charging Port Ledges
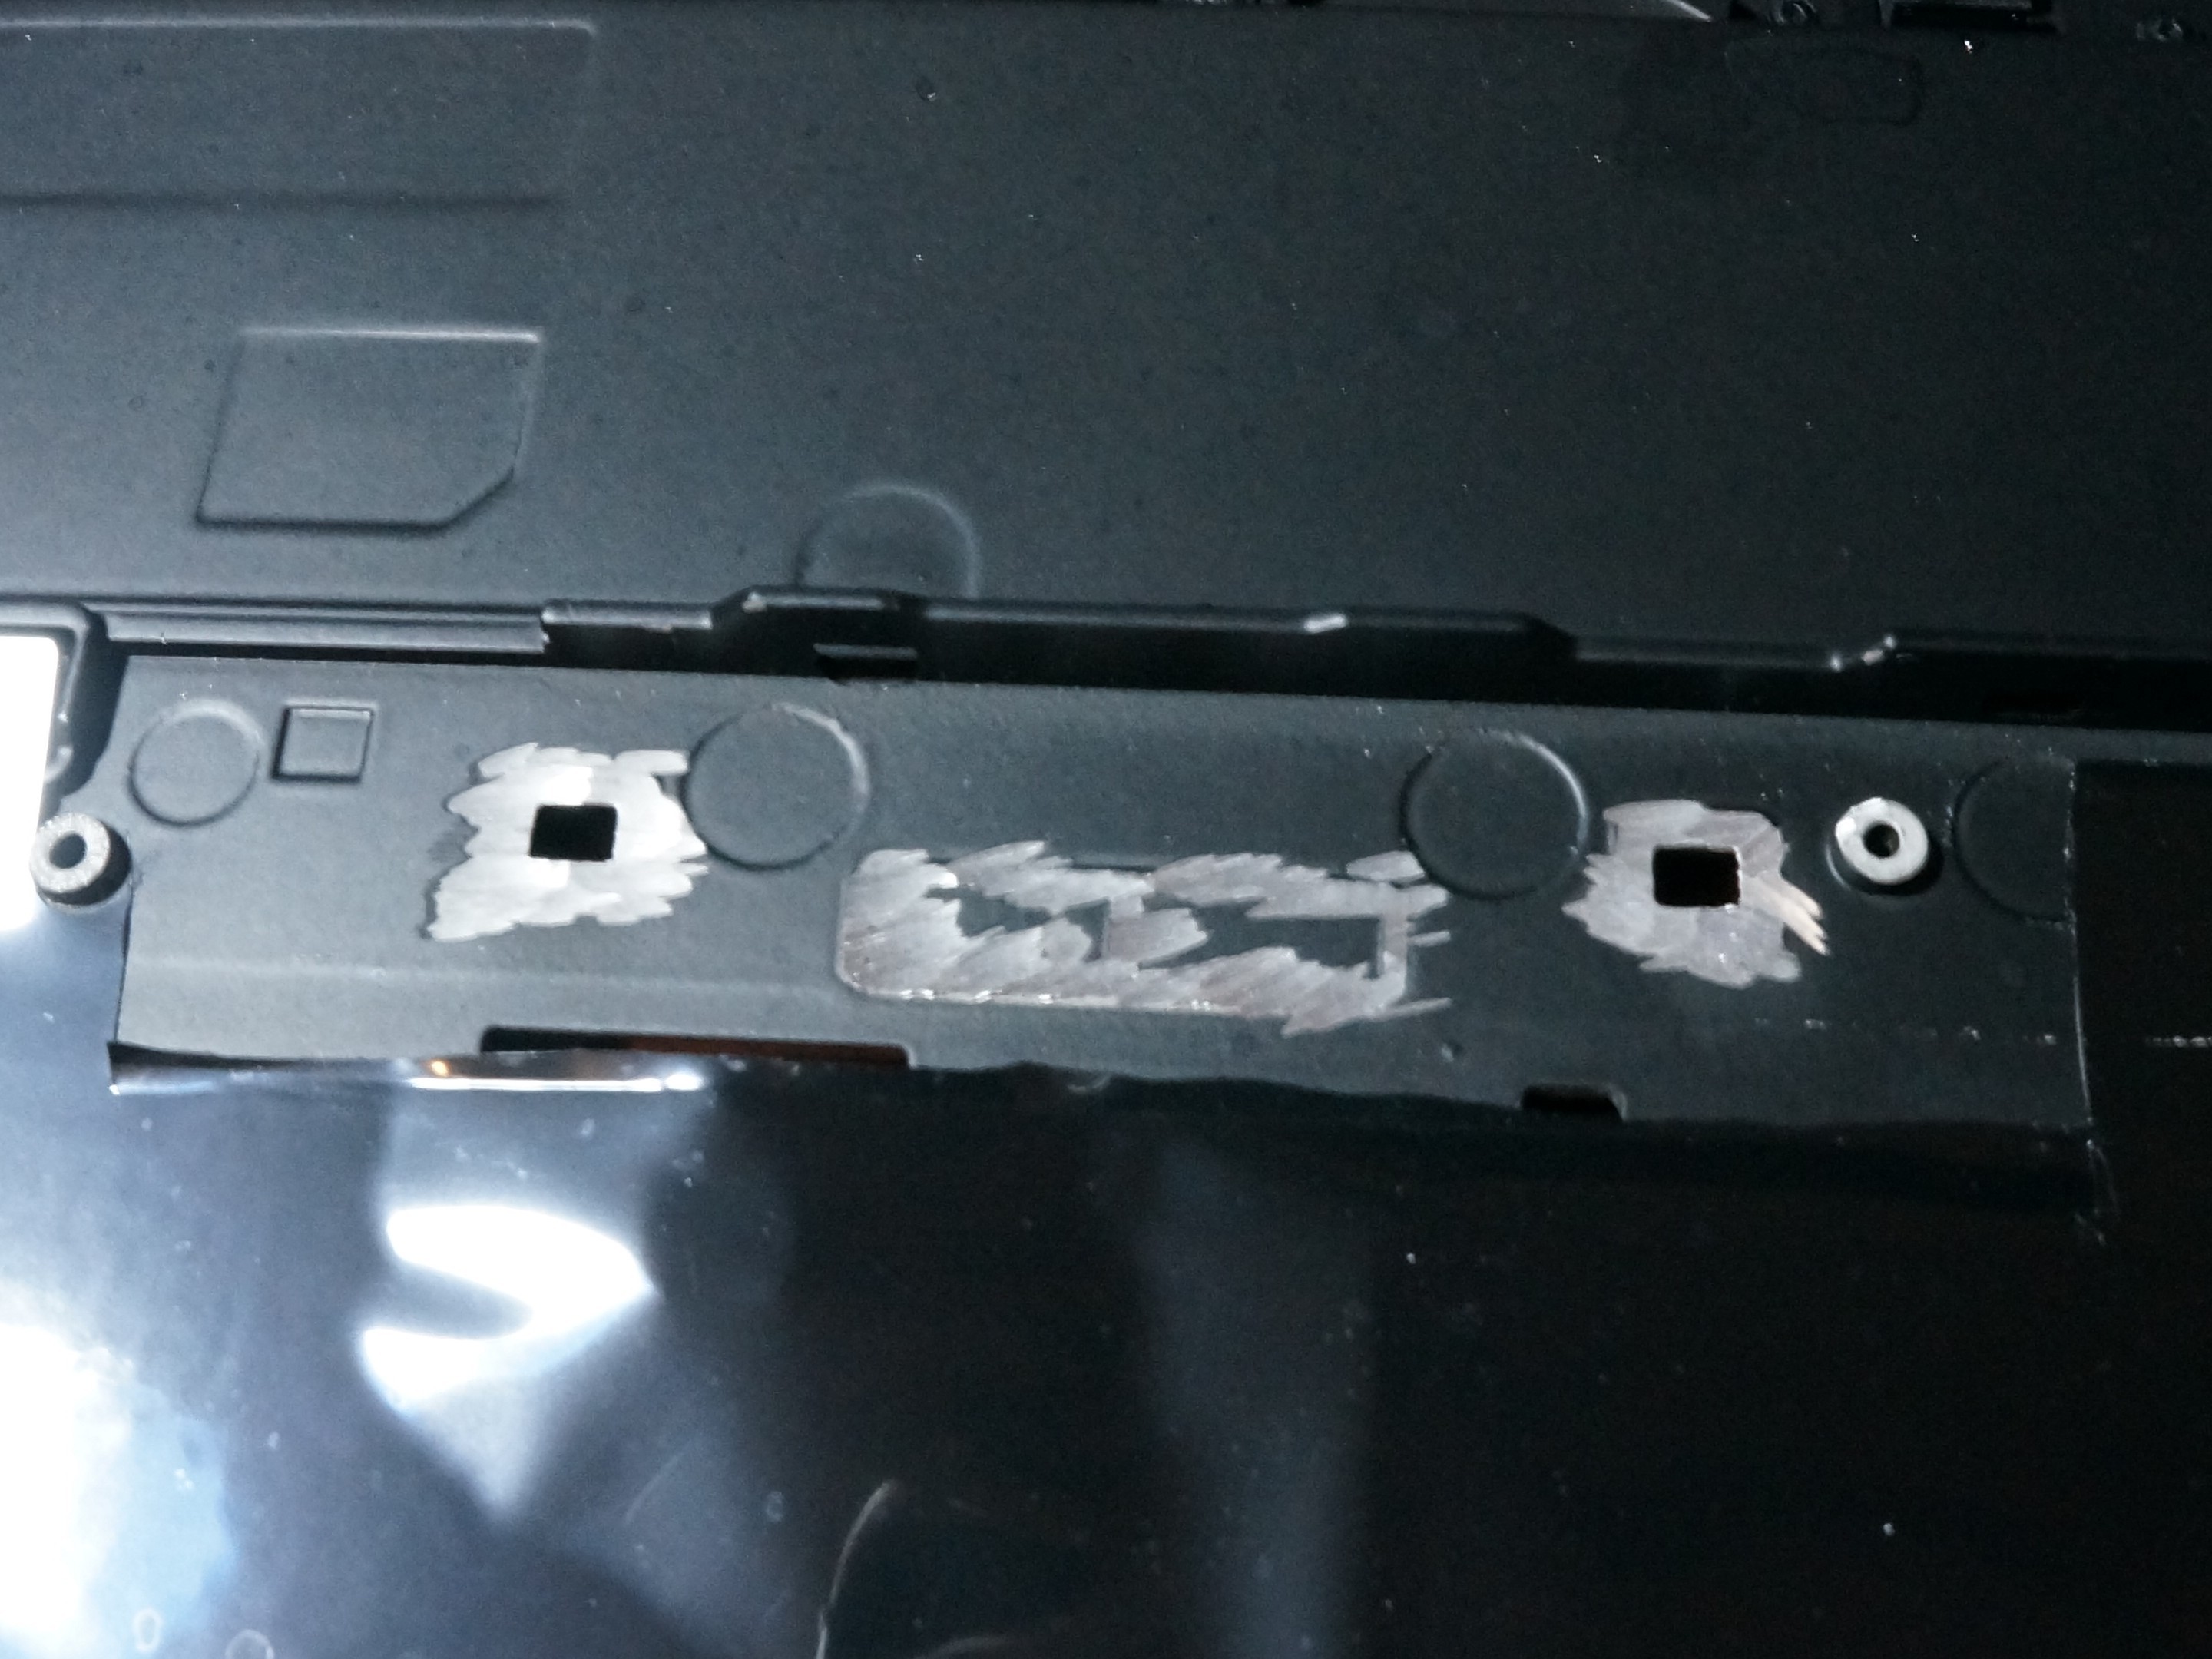
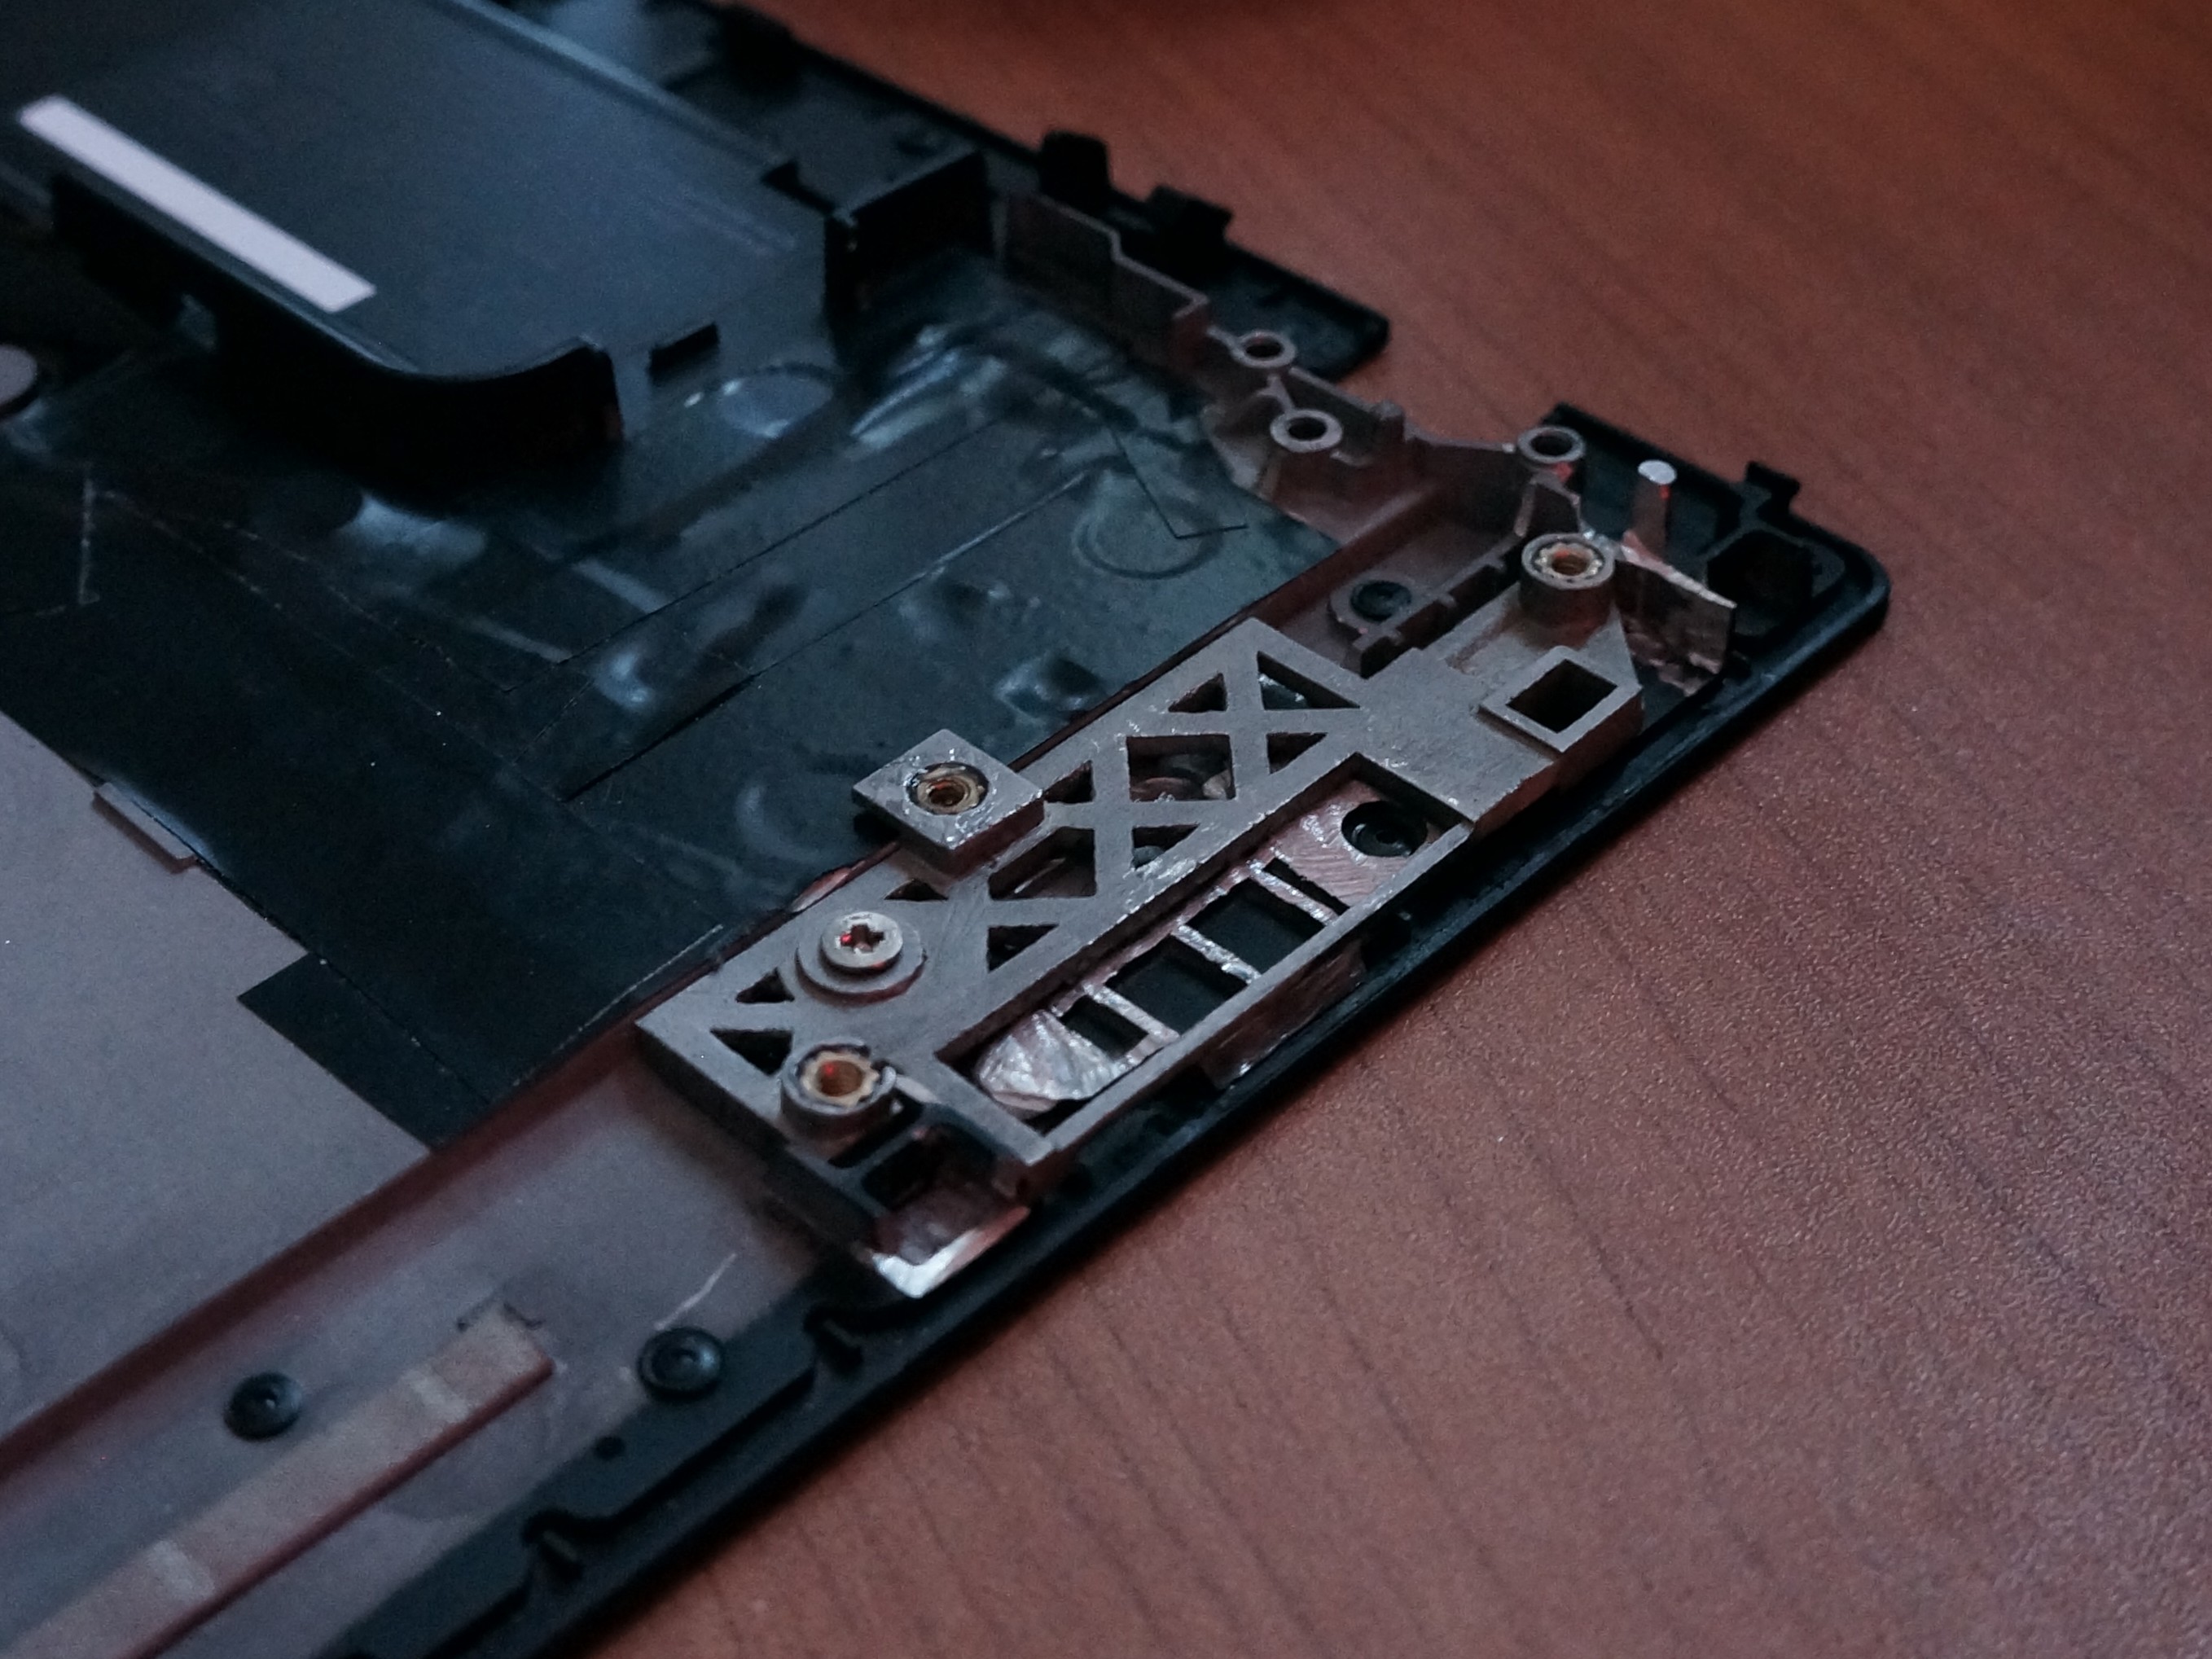
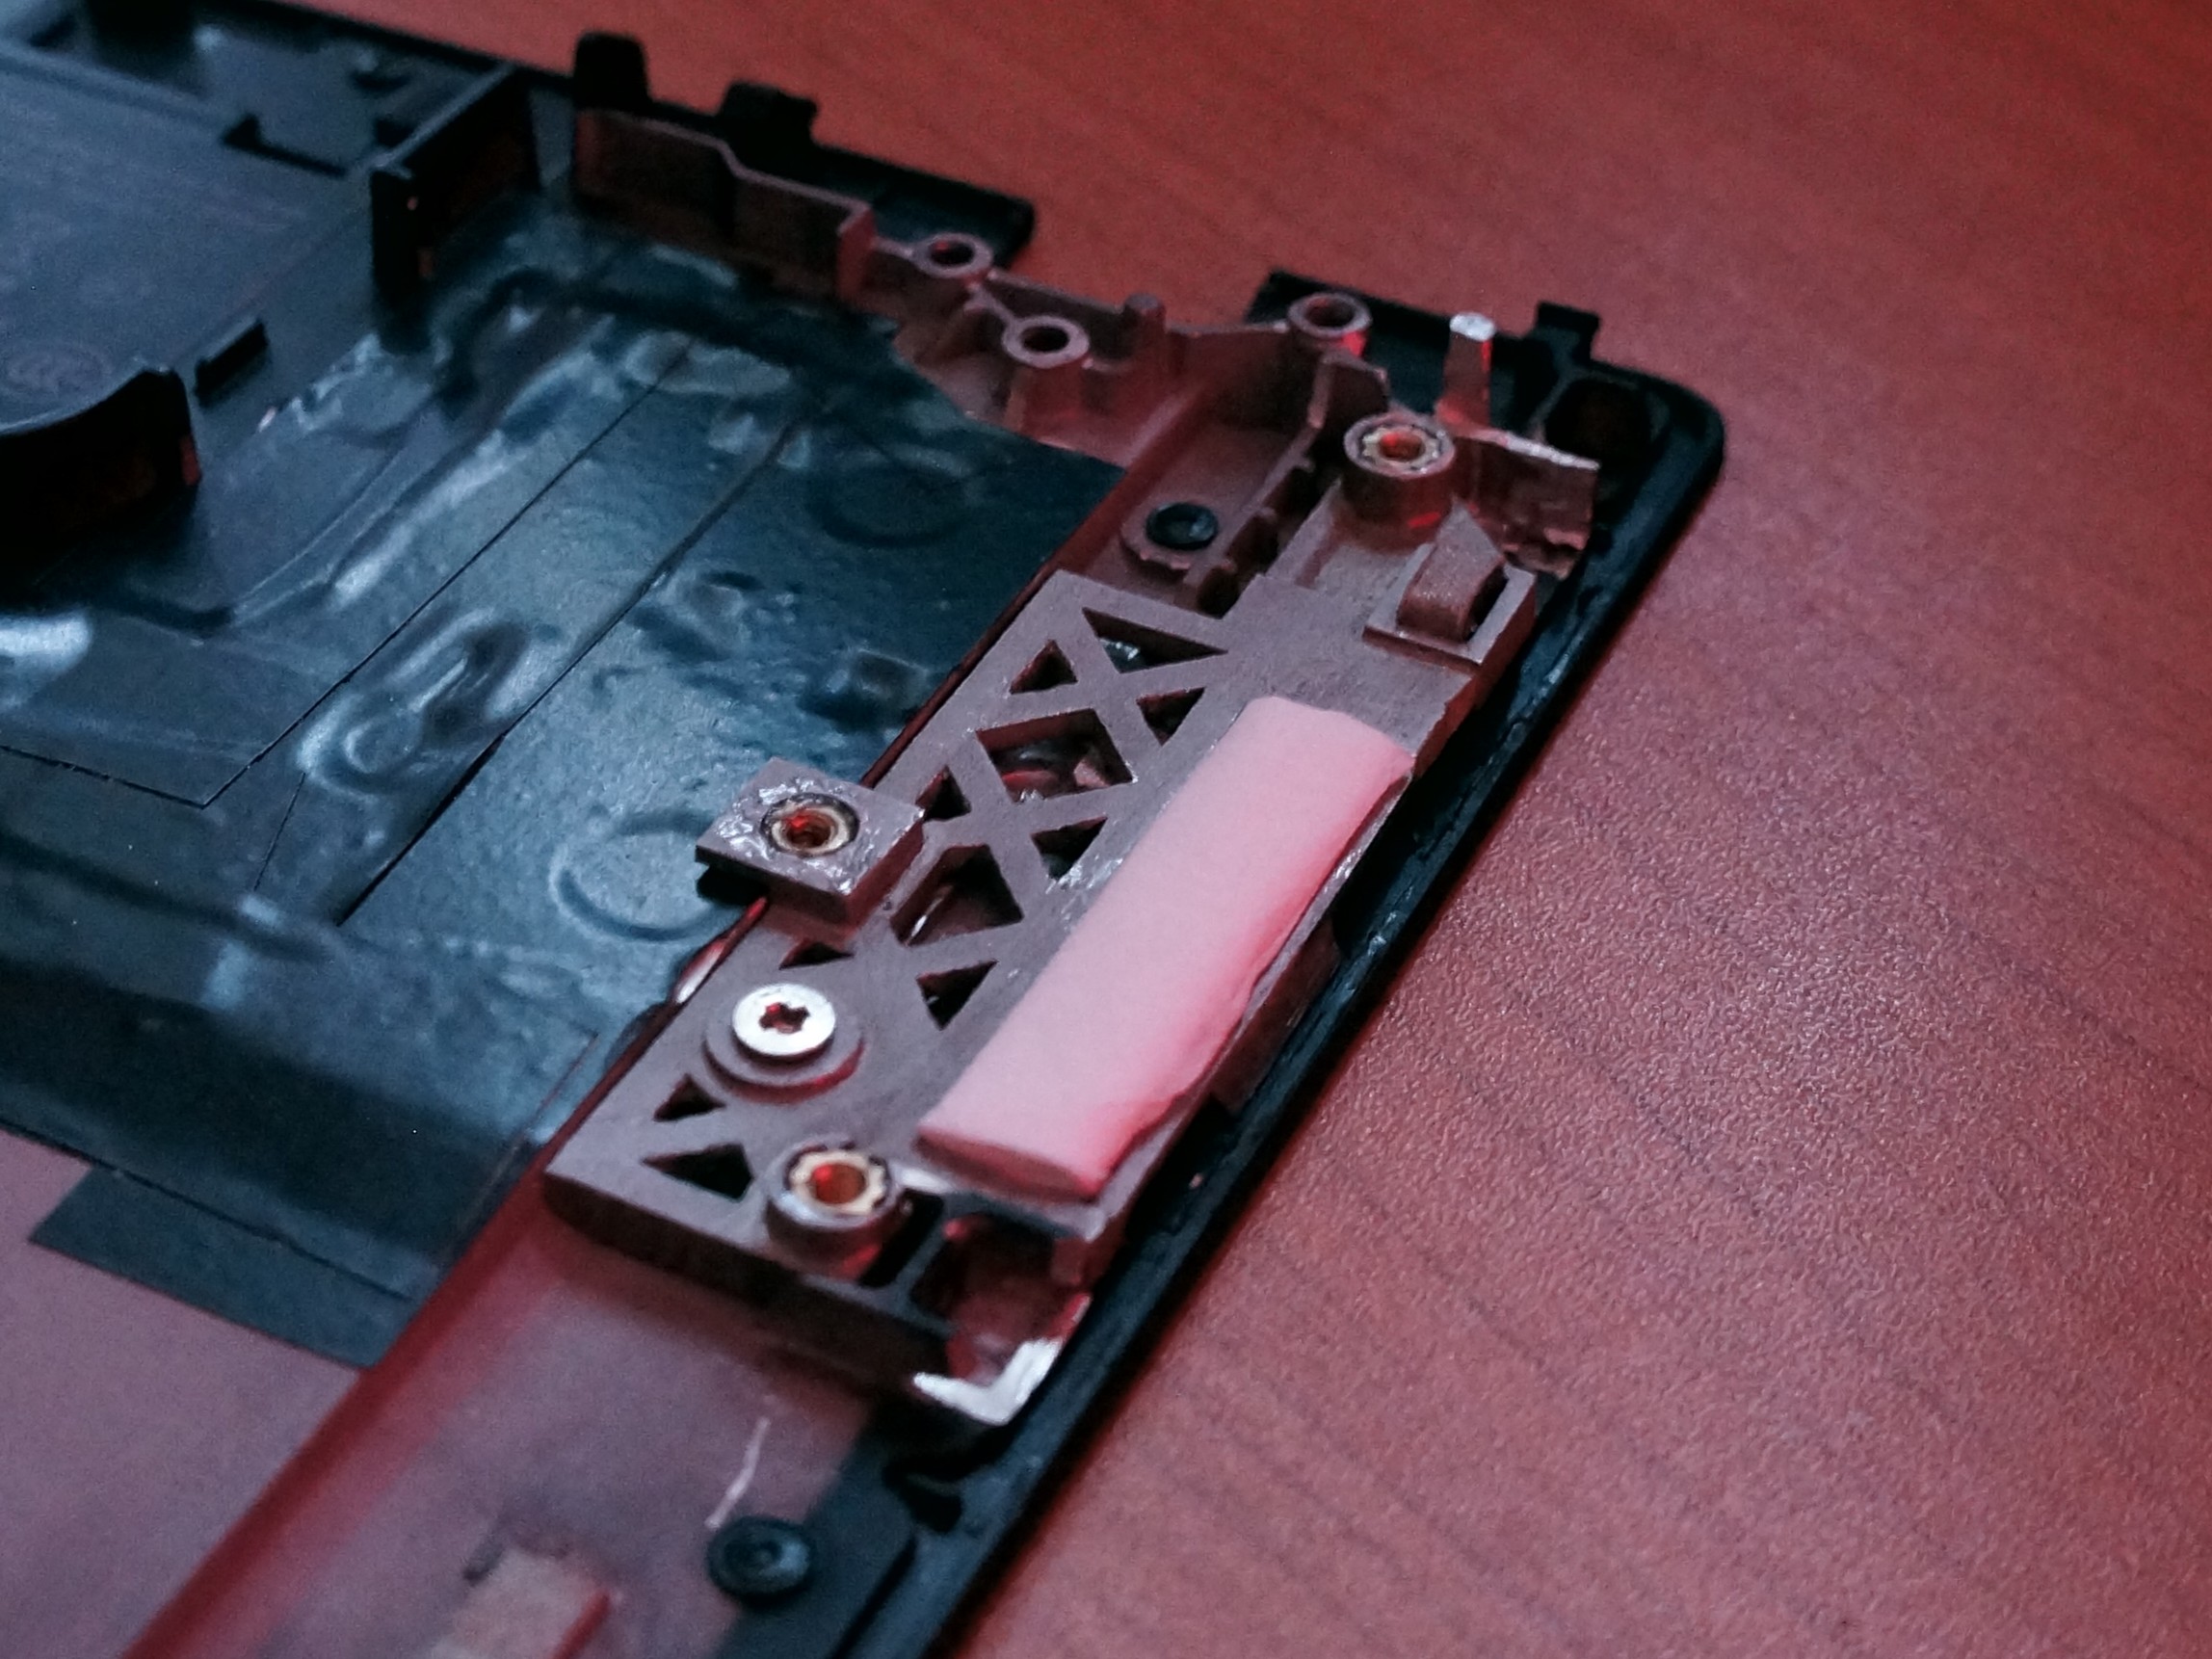
T480 uses a new docking connector: the old docking connector at the bottom was removed. The old connector has mounts on the top case with matching holes on the system board. T480’s system board doesn’t have them so these mounts should be removed (photo 1).
T480 uses USB-C charging port instead of old square port. On T25 this port was separated from the system board and connected to it with cable. T480’s system board is larger at this place so the ledges should be removed as well (photo 2).
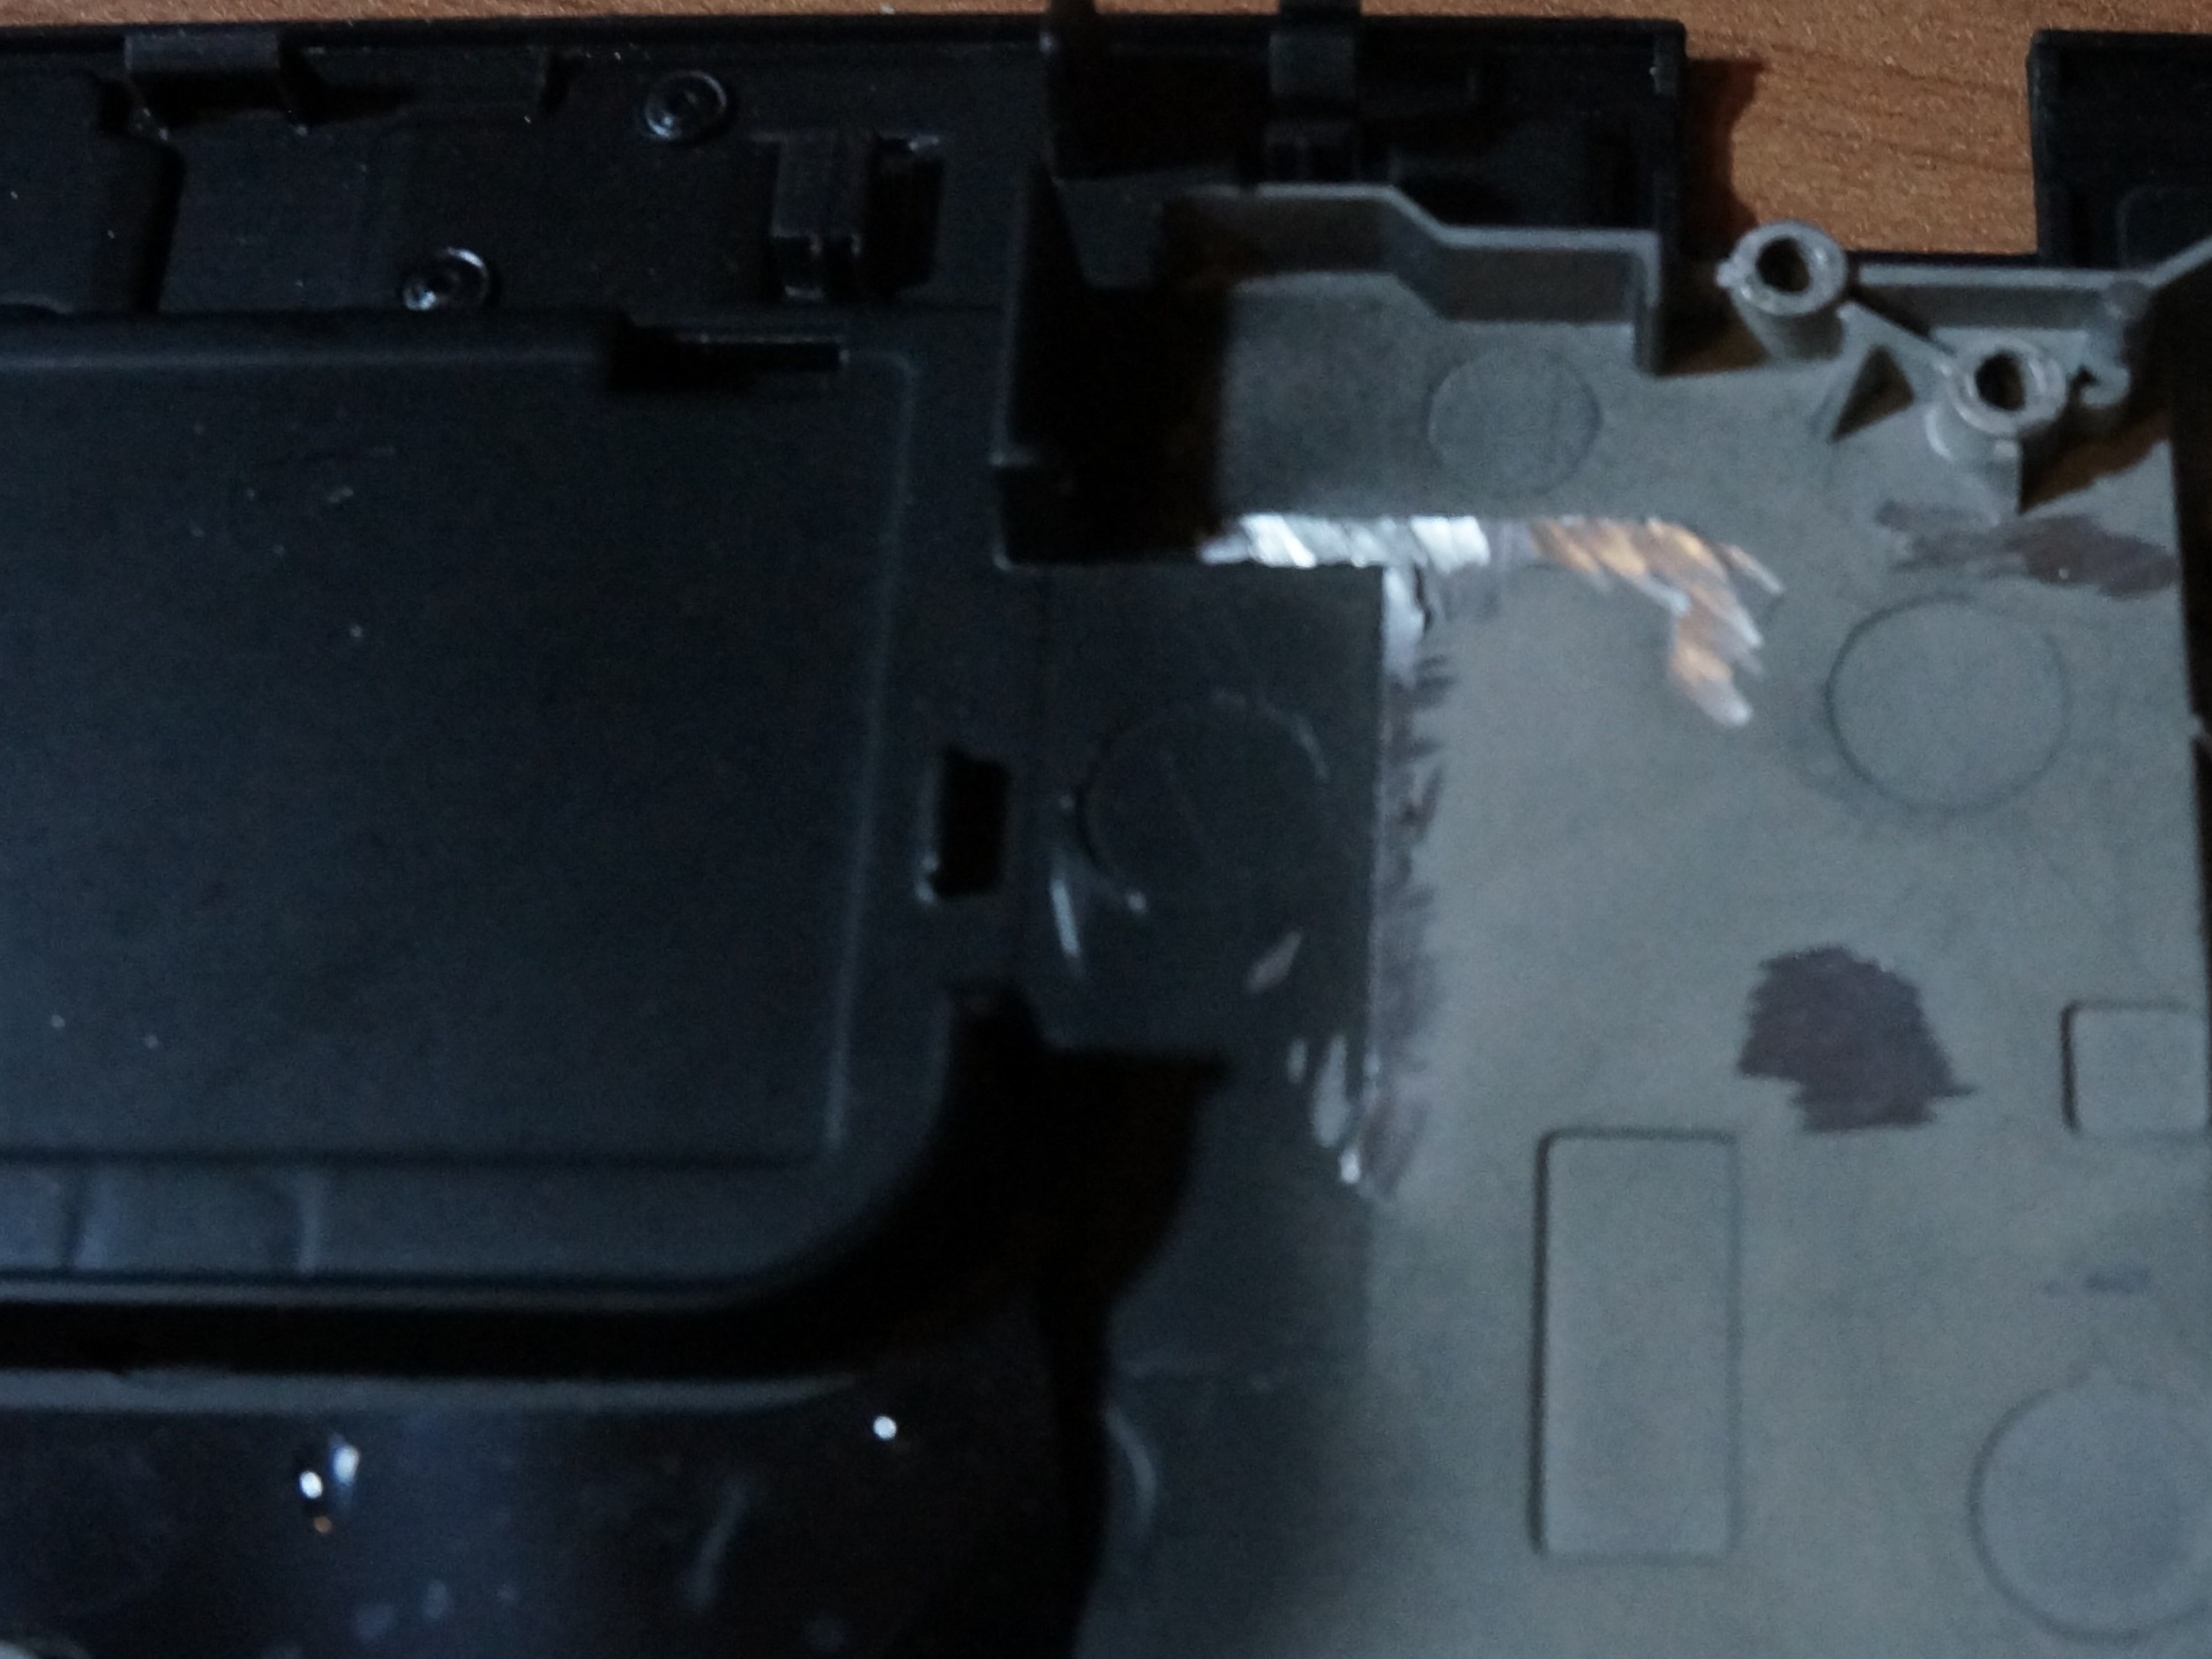
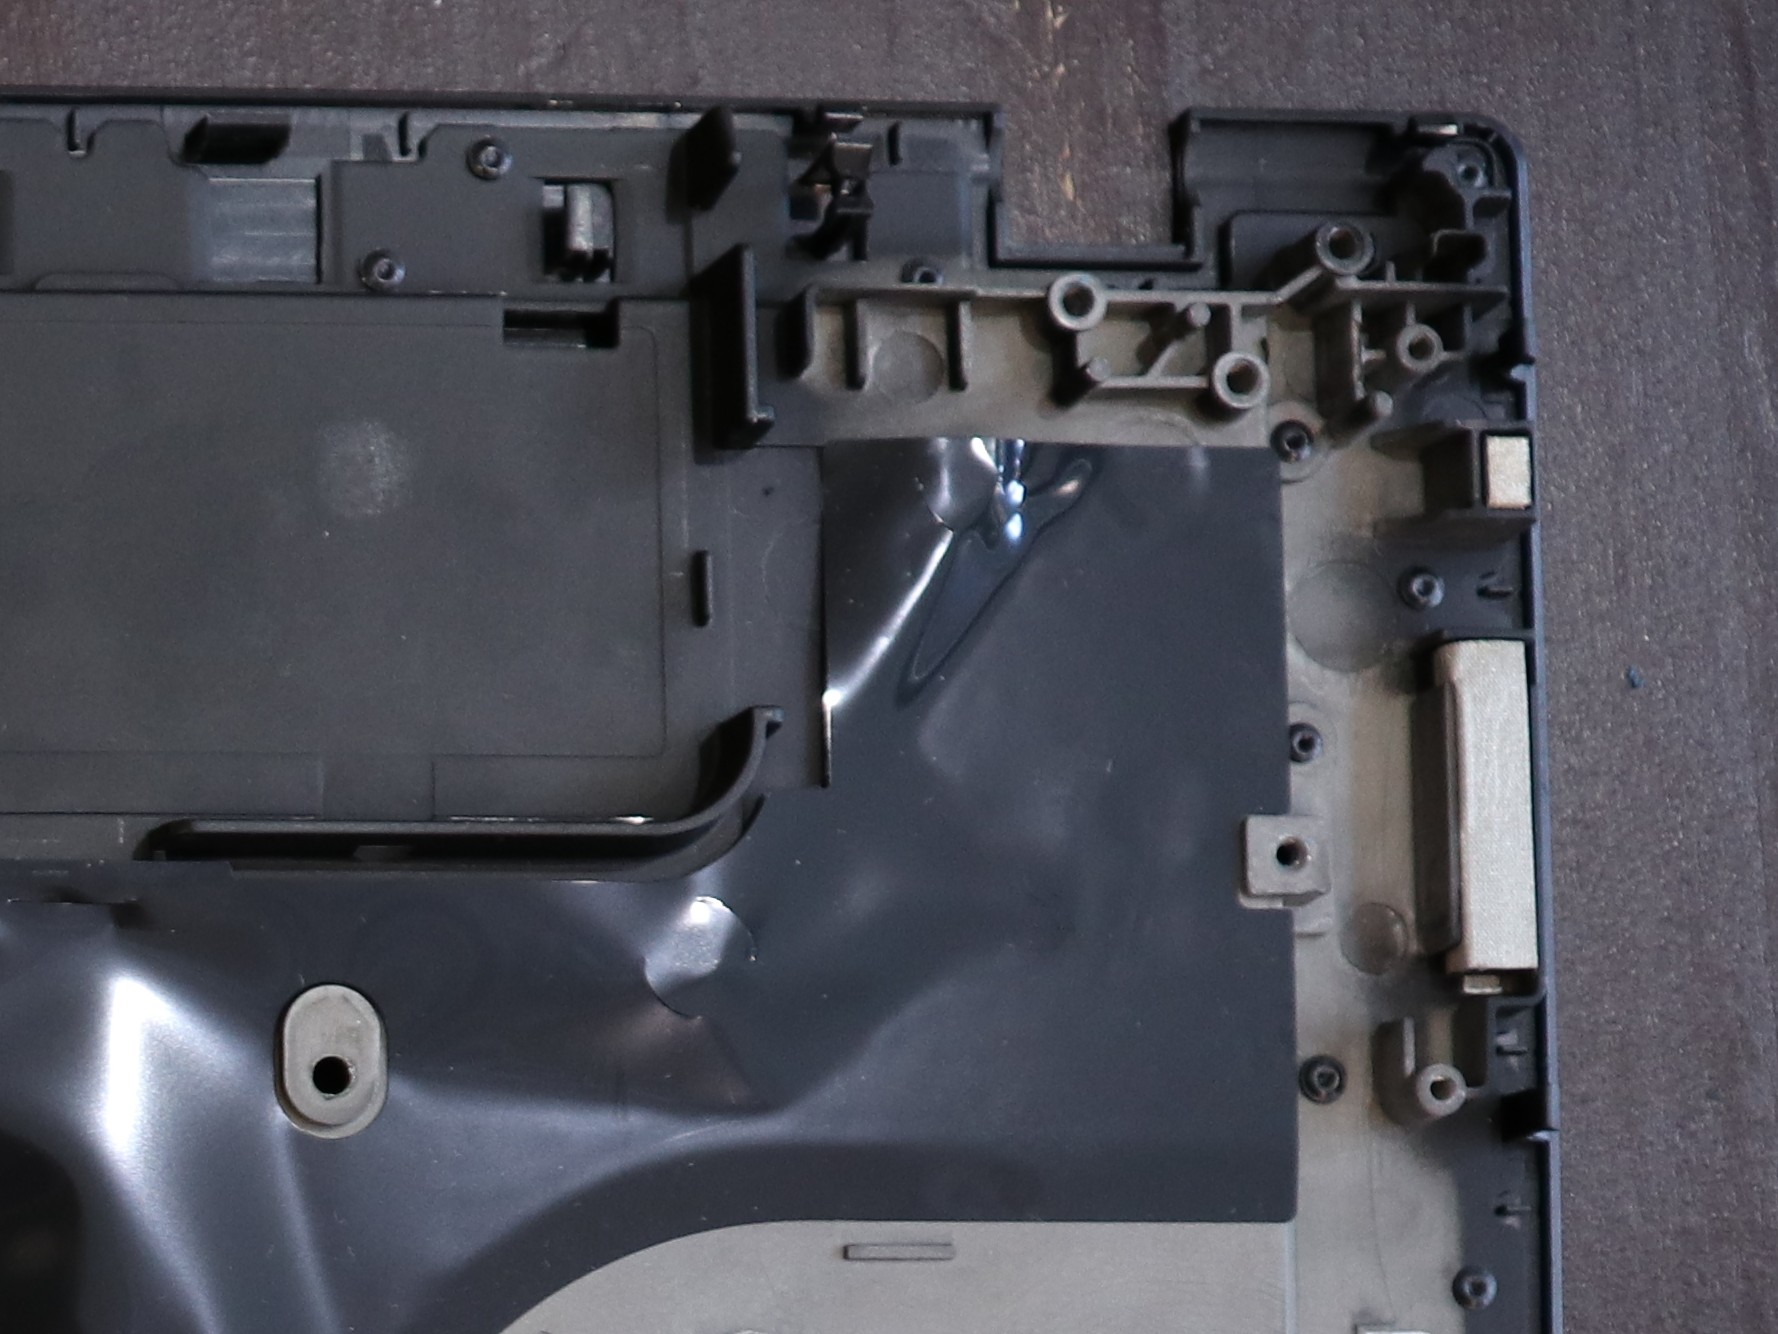
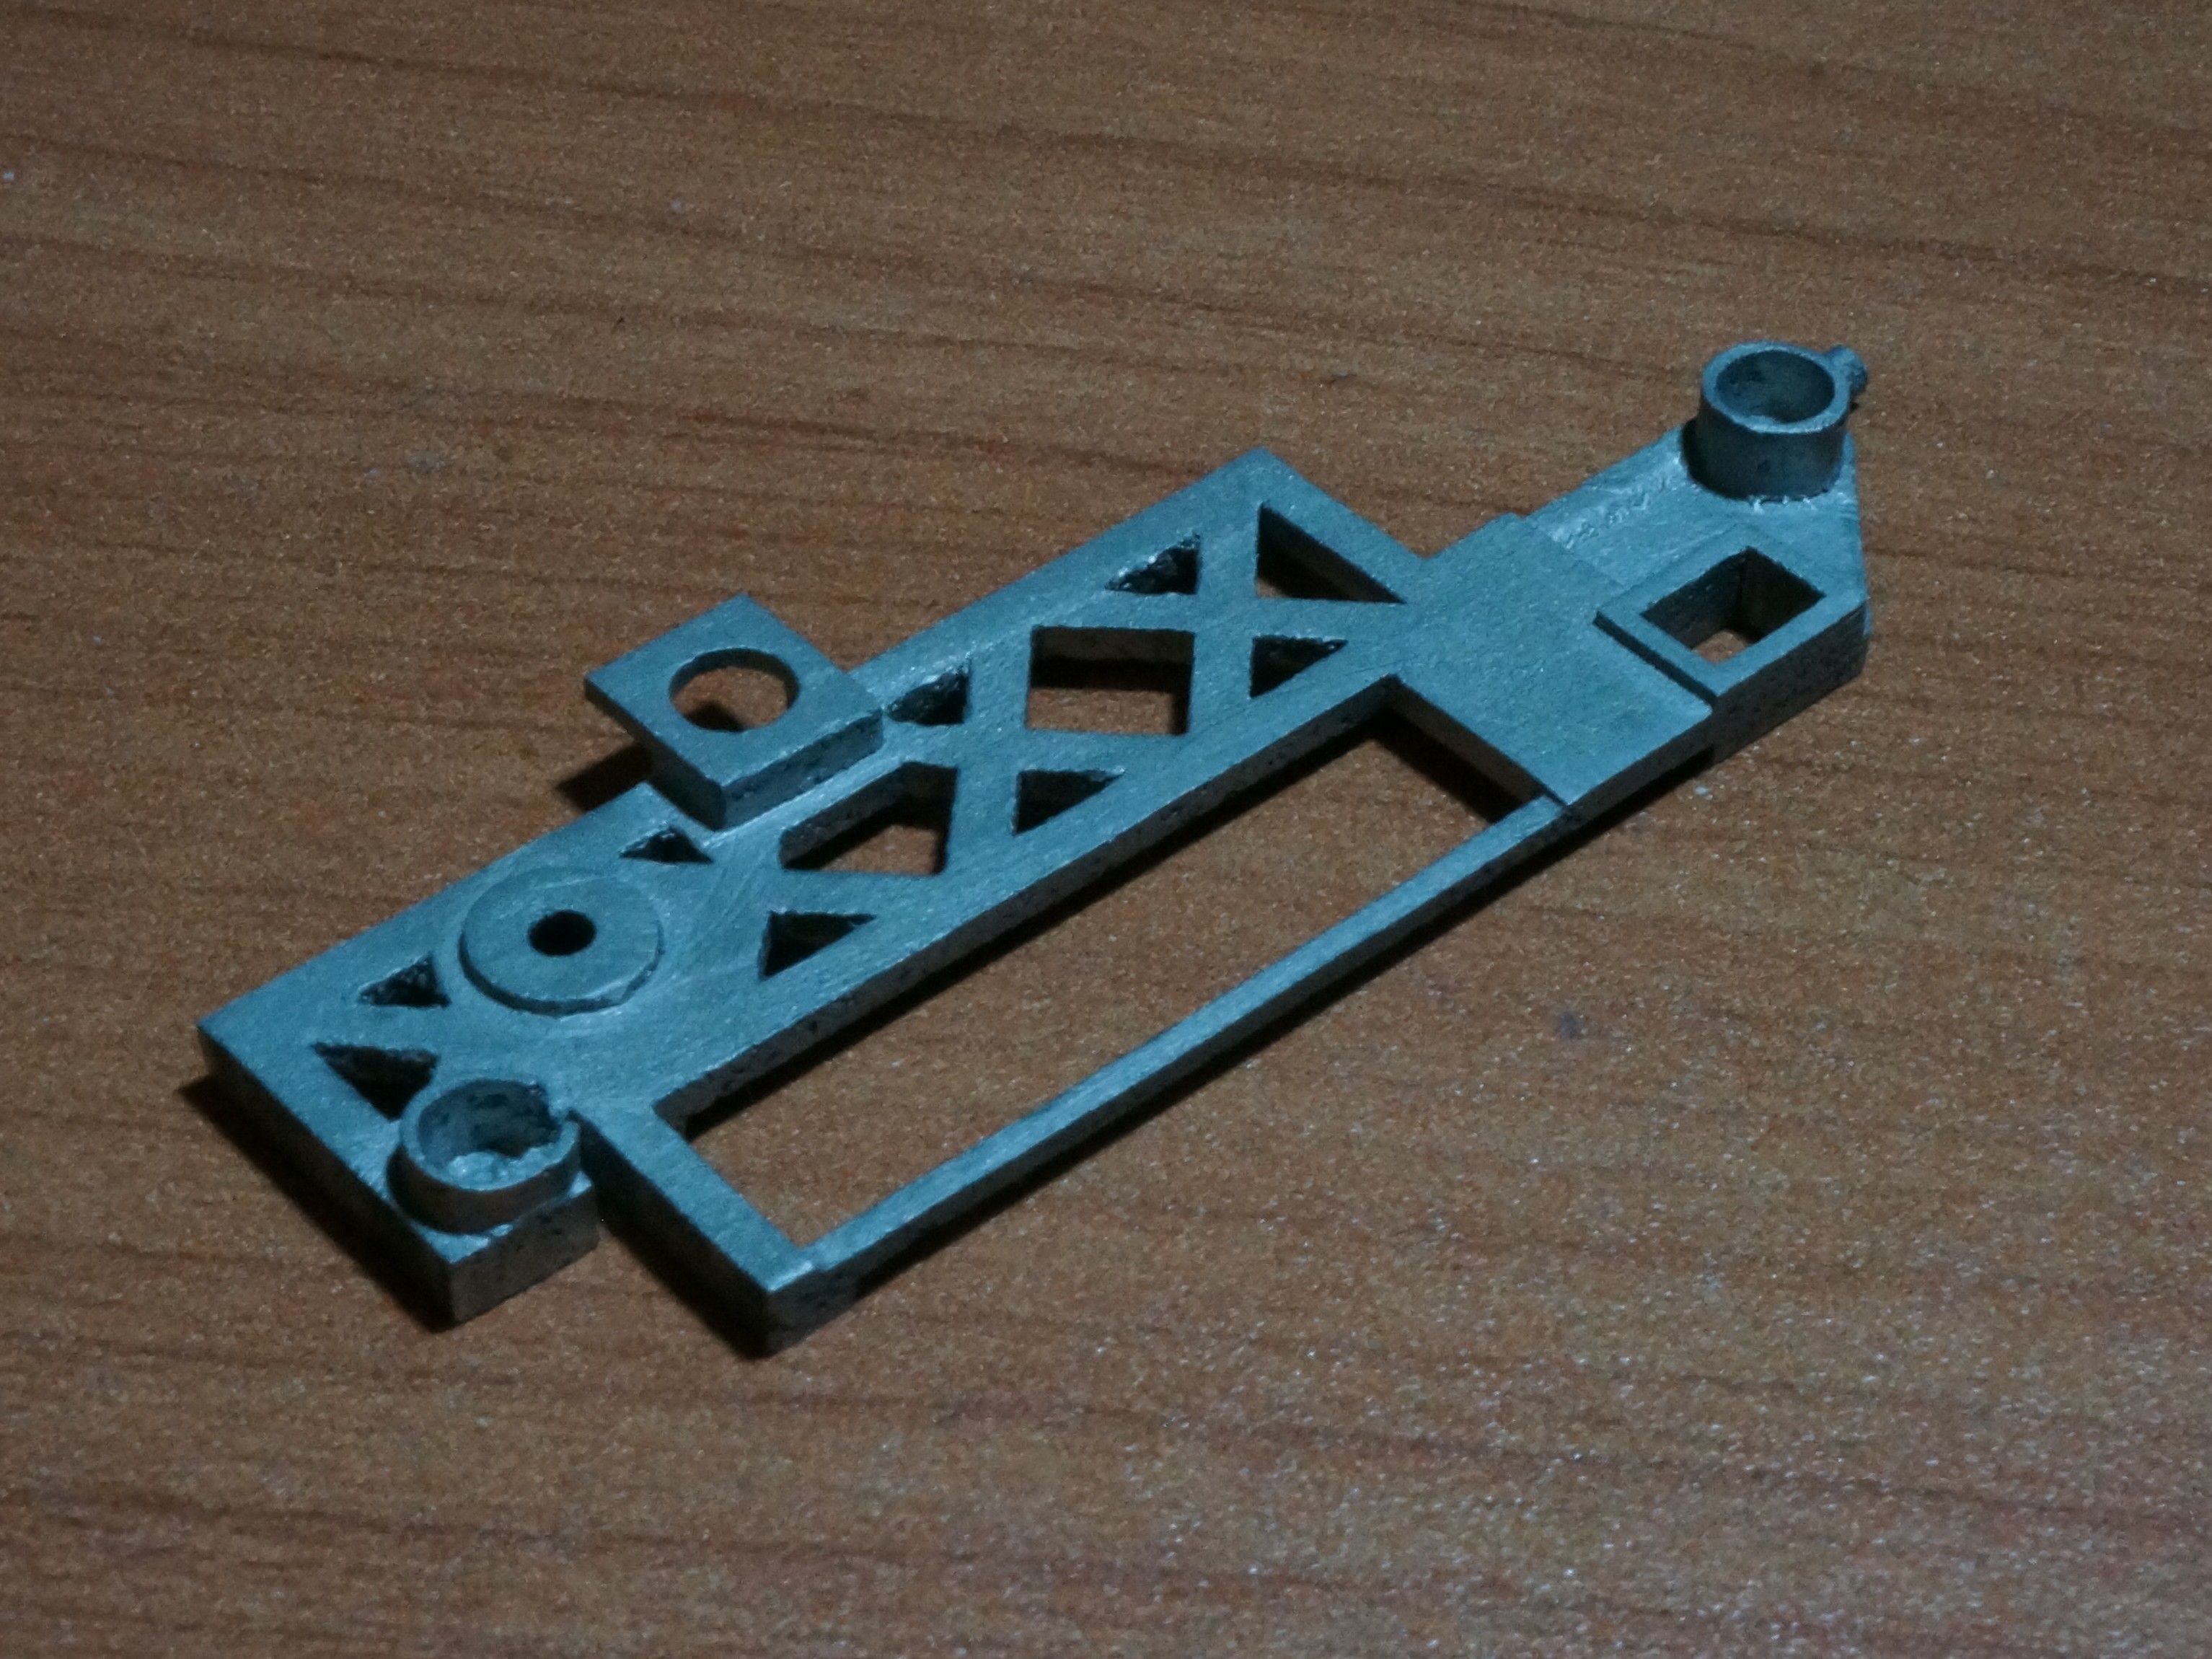
Reconstructing the Mounts
As I told before, the set of ports on the left side was changed, and the top case was changed as well (photo 1). The top case should be modified so you could install the system board and fix it with screws. So I decided to cut down everything (photo 2) and make a detail which will resemble the shapes of T480’s top case (photo 3). The detail will be fixed by screw to the single mount I left in place (cut to 2.7mm tall) and the hole I made on the other side of the top case (1mm in diameter).
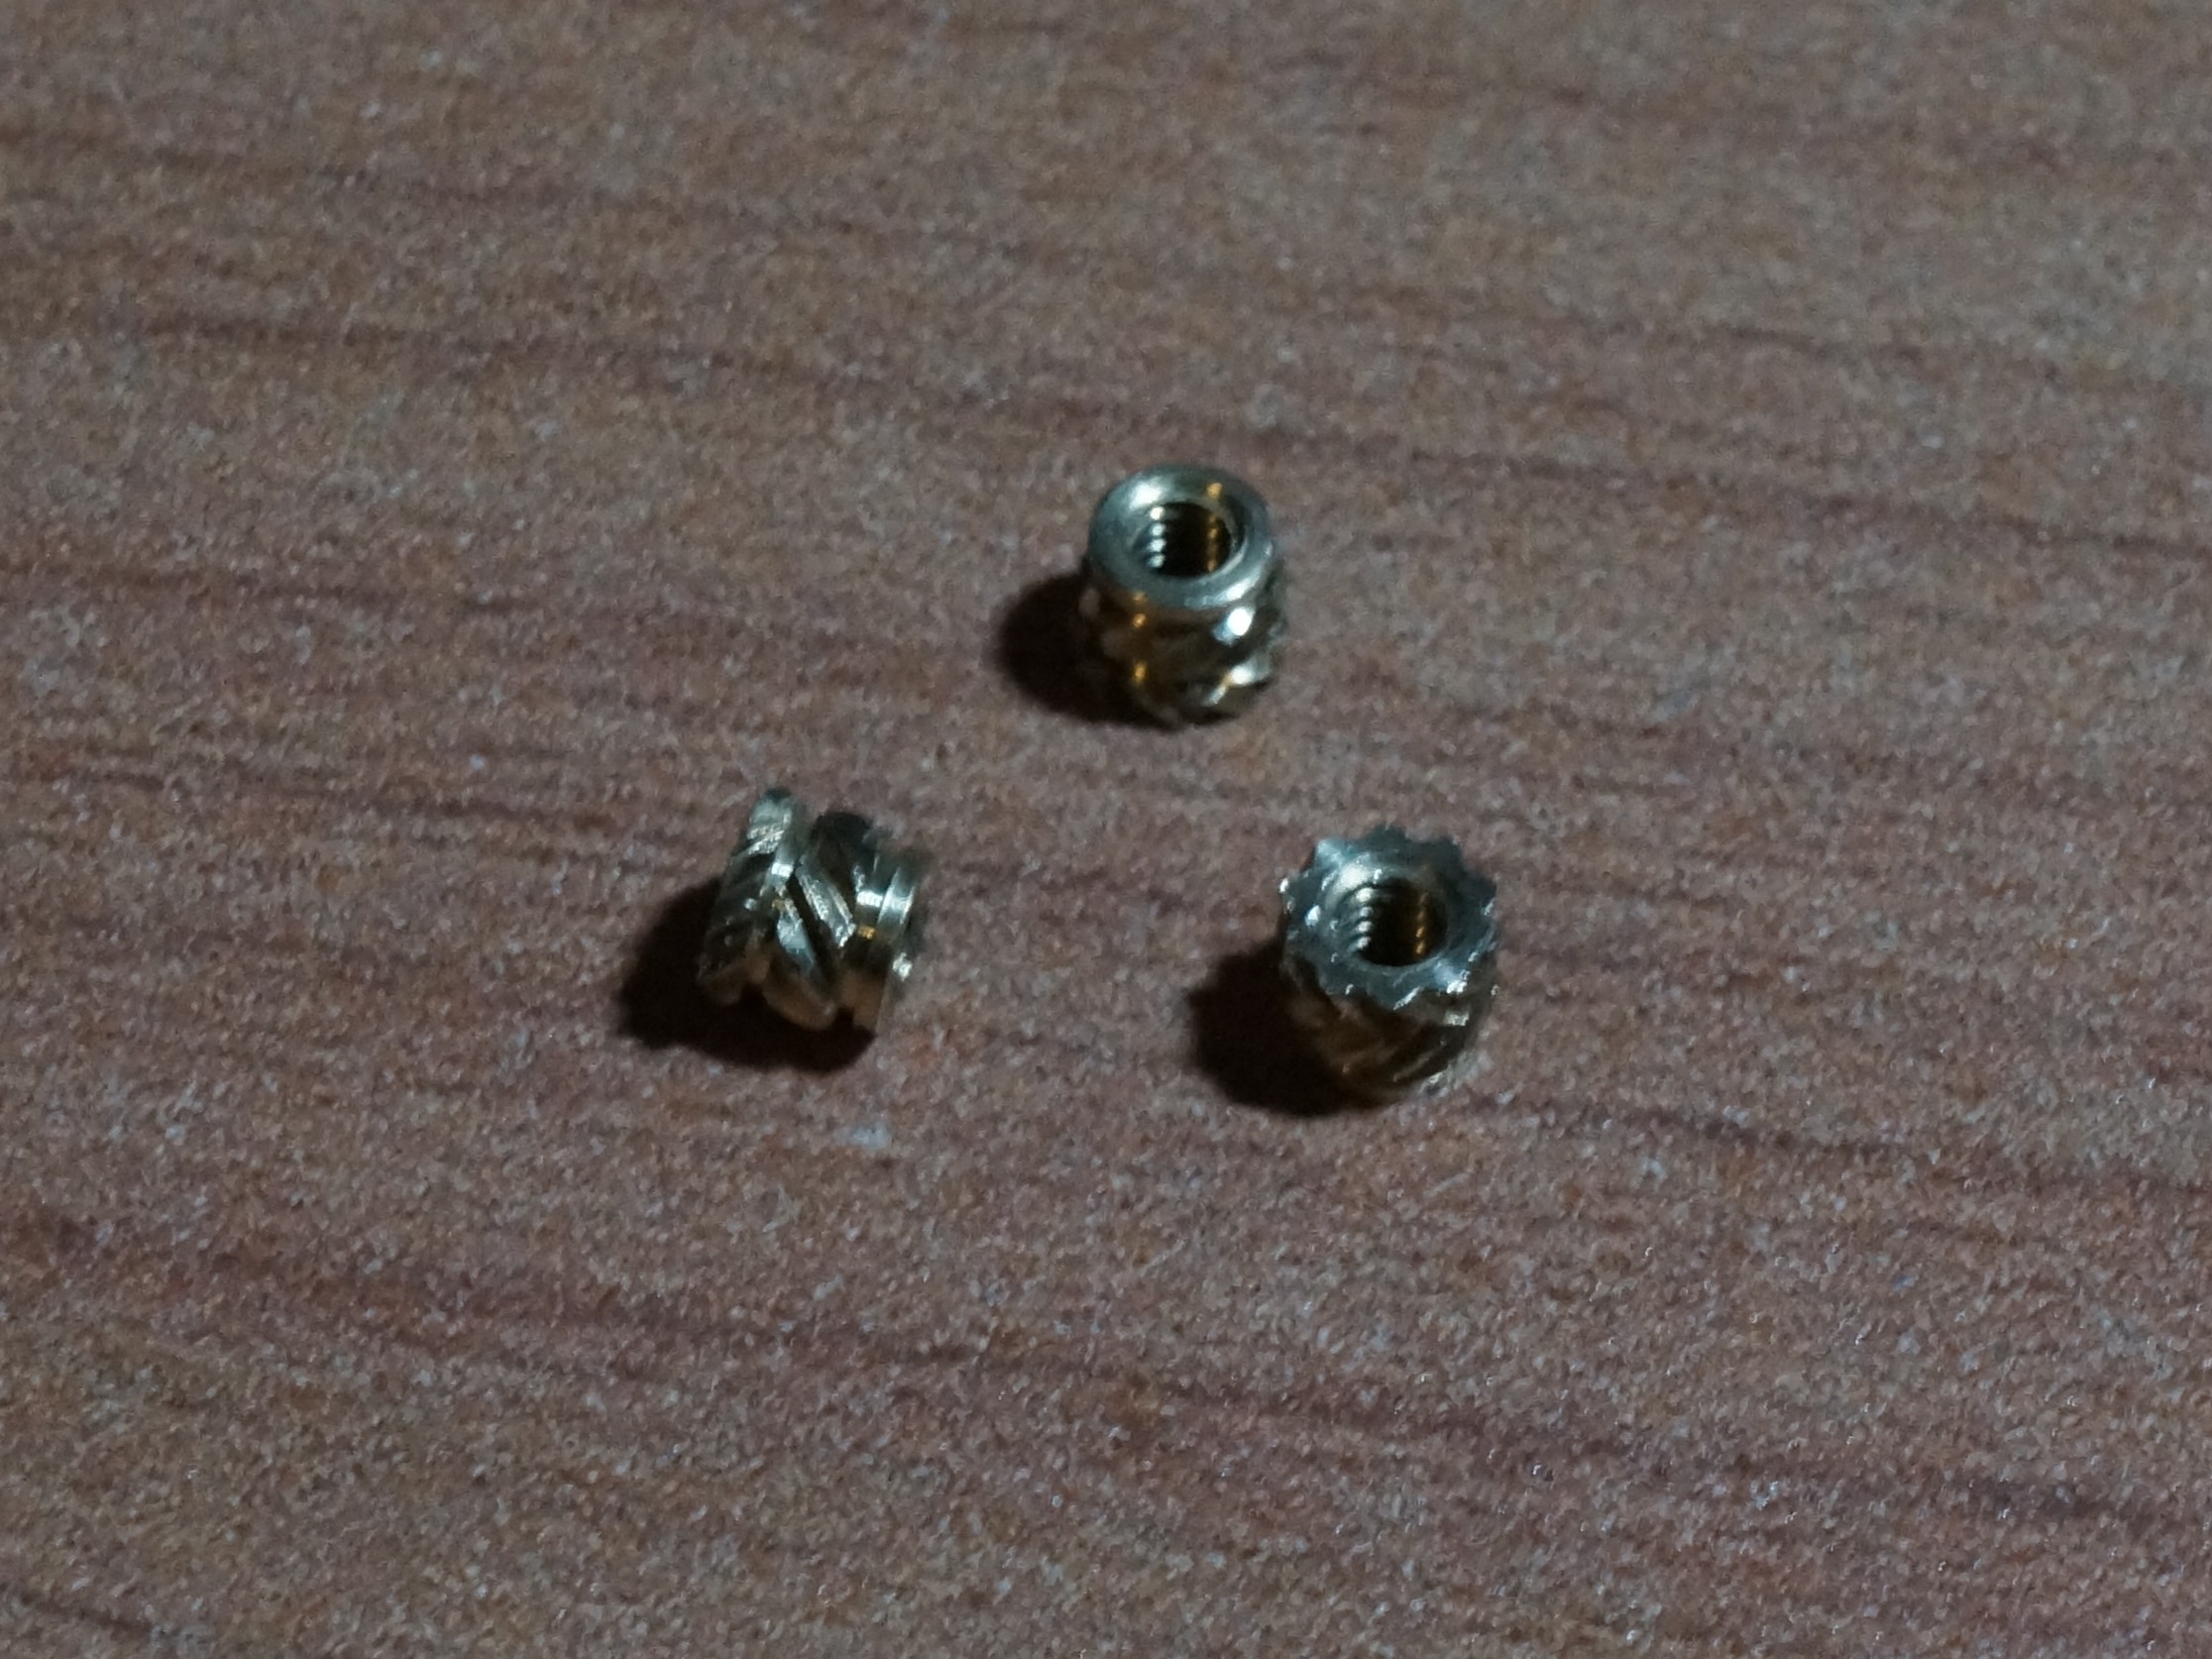
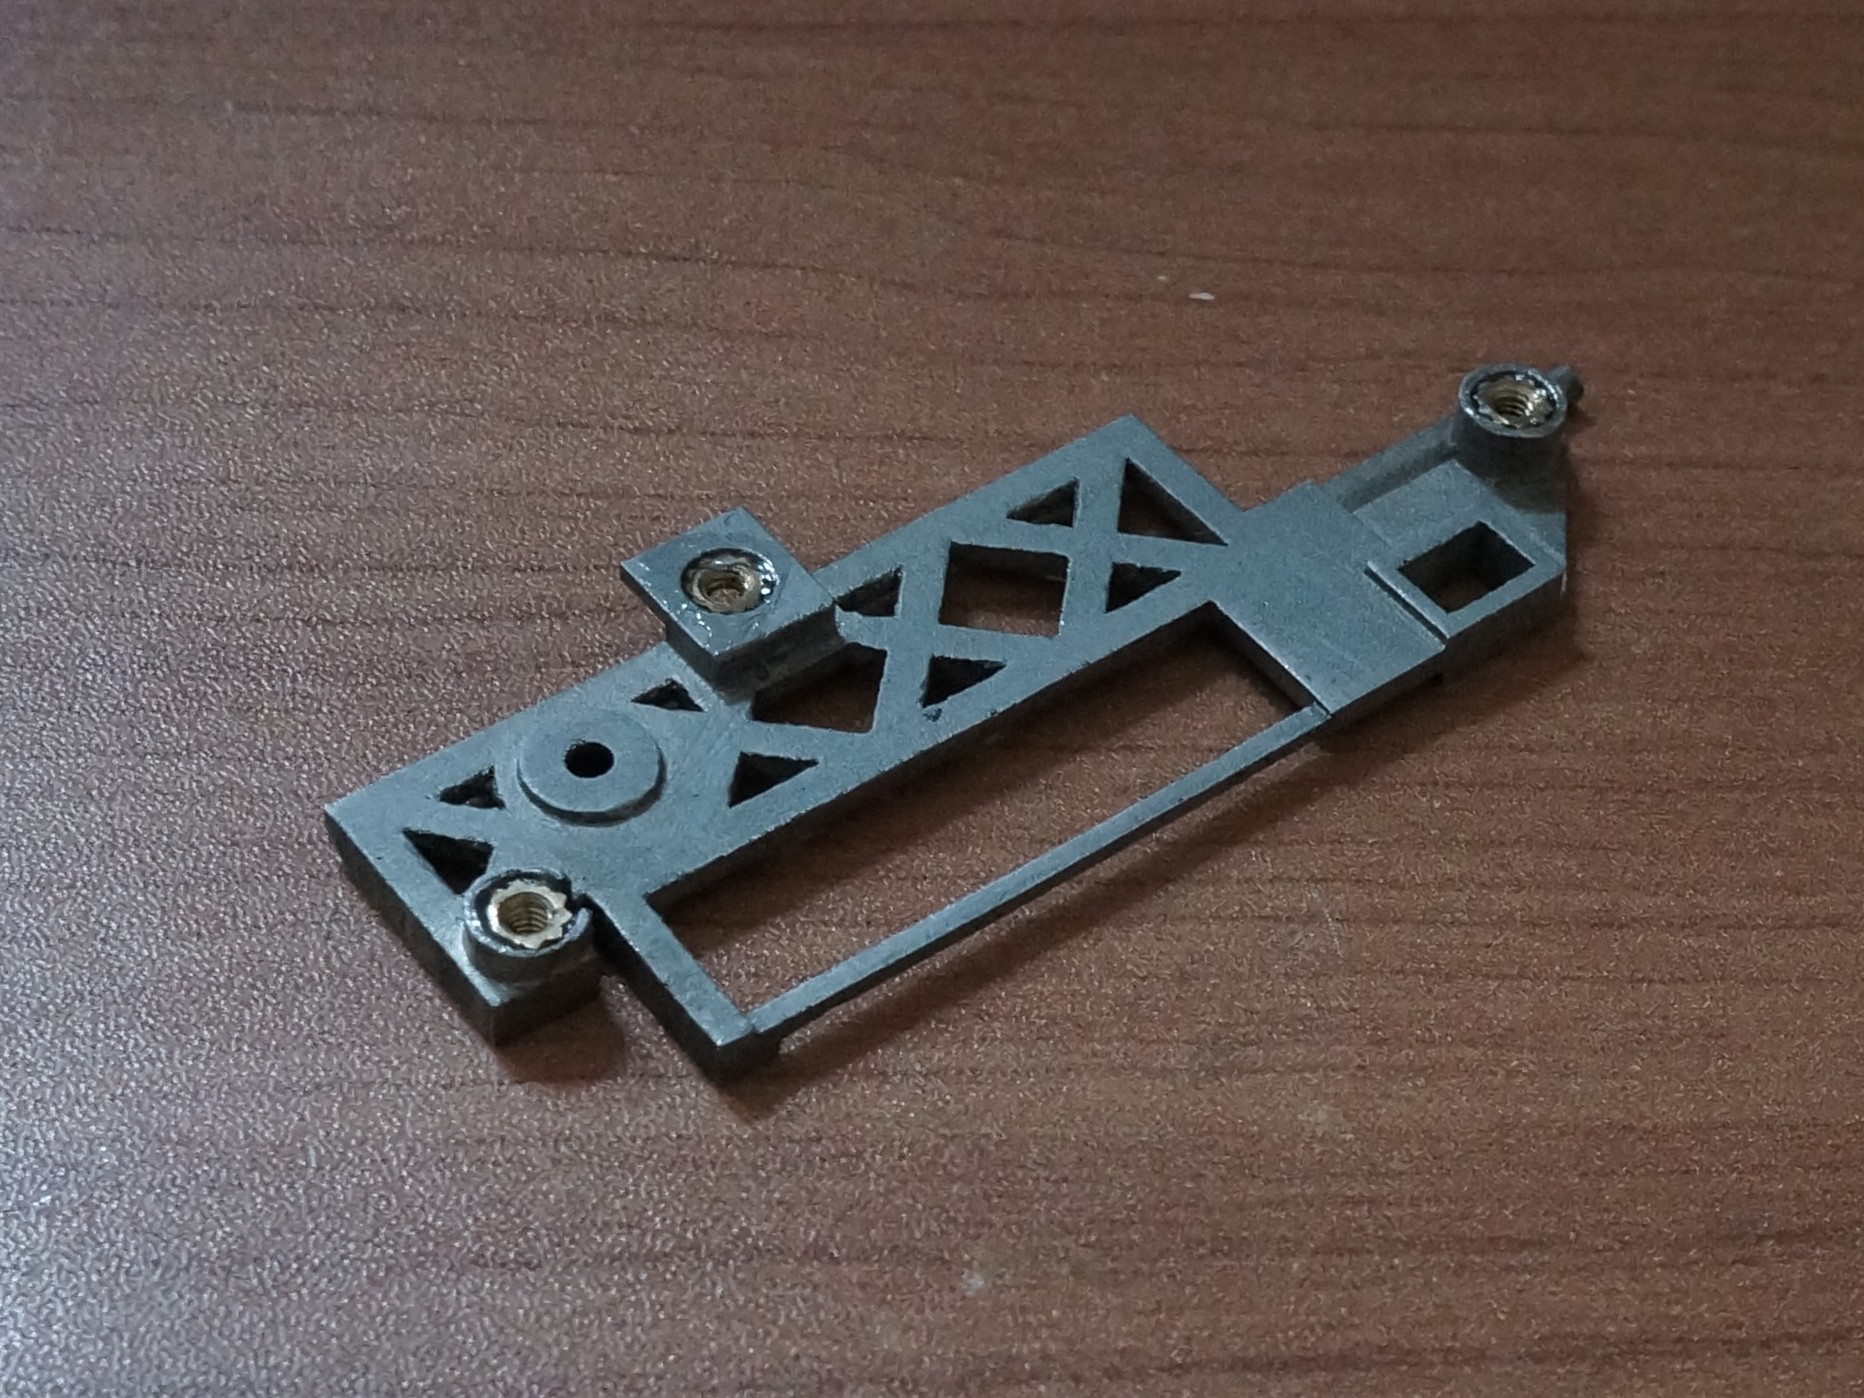
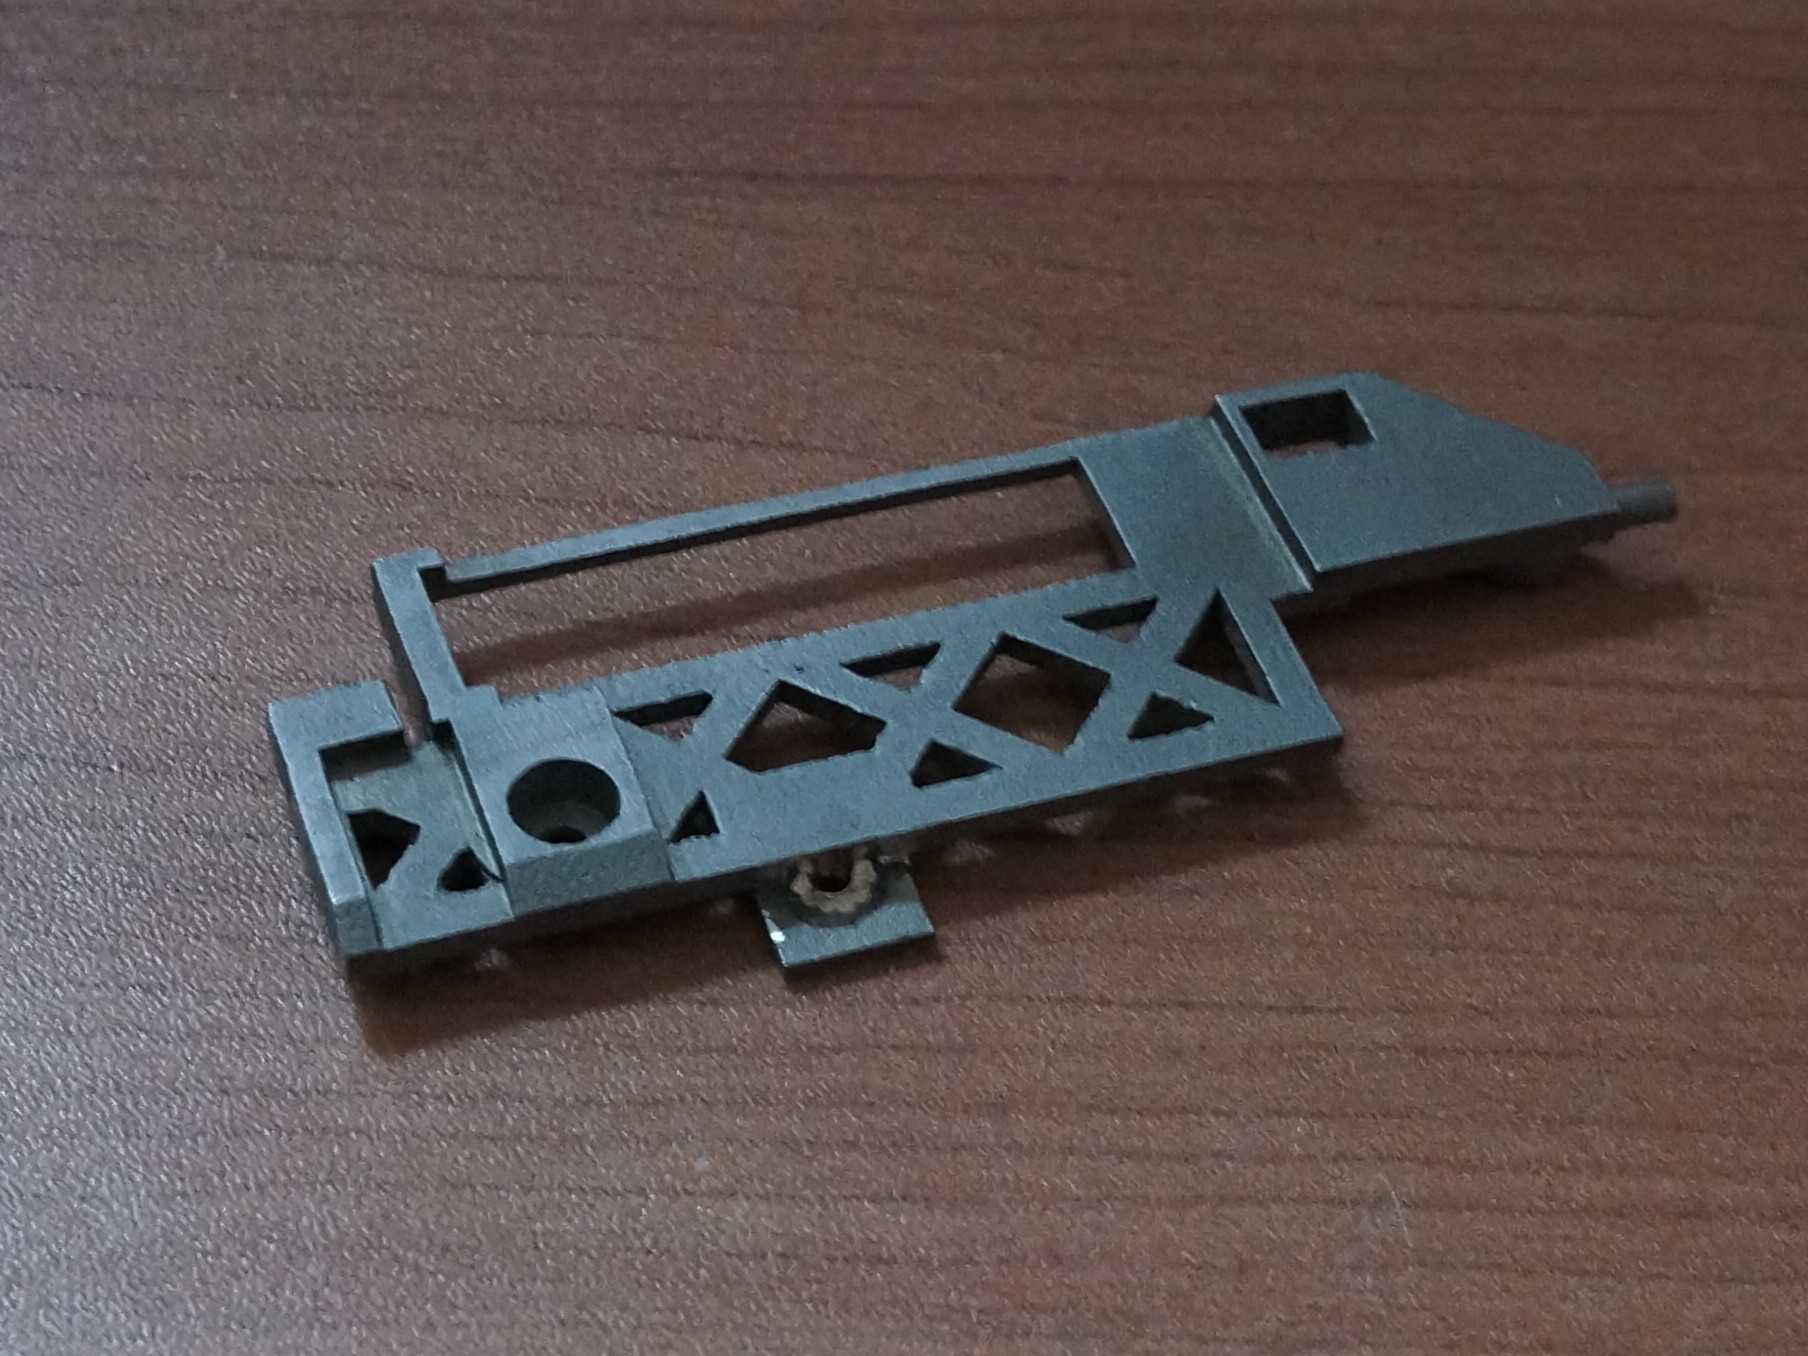
This detail requires anchors which I borrowed from old broken X200’s palm rest (photo 4) and glued them with epoxy (photos 5 and 6). Then I installed it (photo 7) and added soft spacers (photo 8).
You can also use this detail if you wish:
- STL model (with truss structure)
- STL model (without truss structure)
- FreeCAD project (don’t get scared, I’m an amateur)
Missing Clips
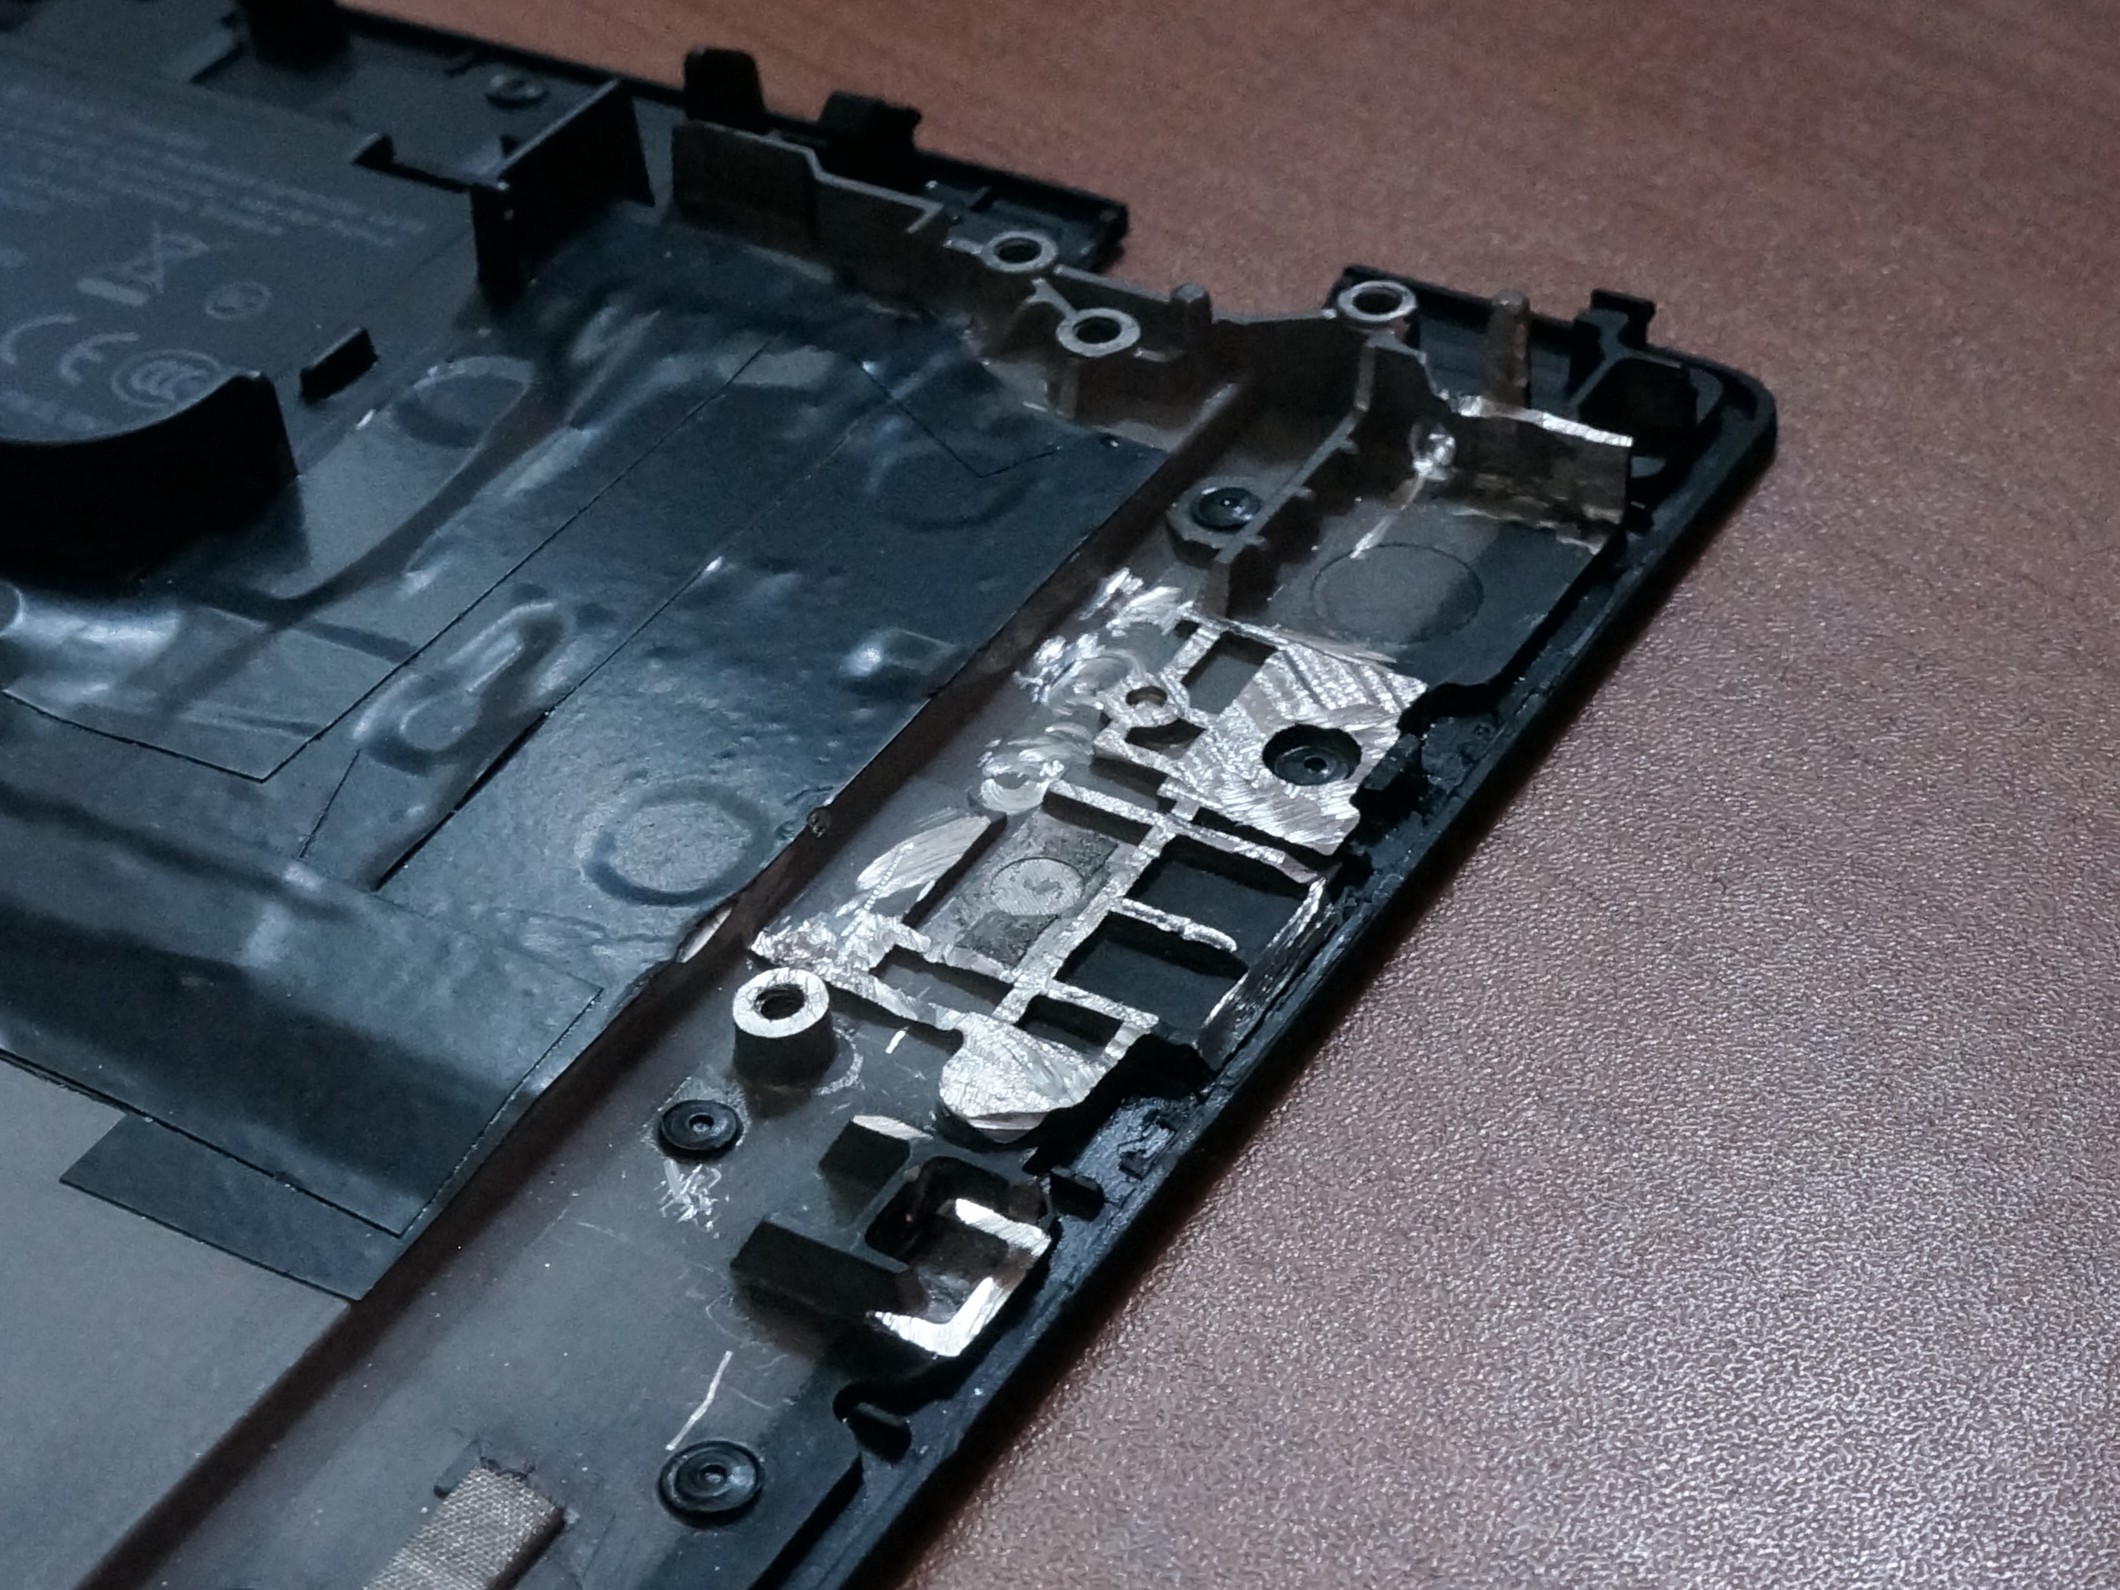
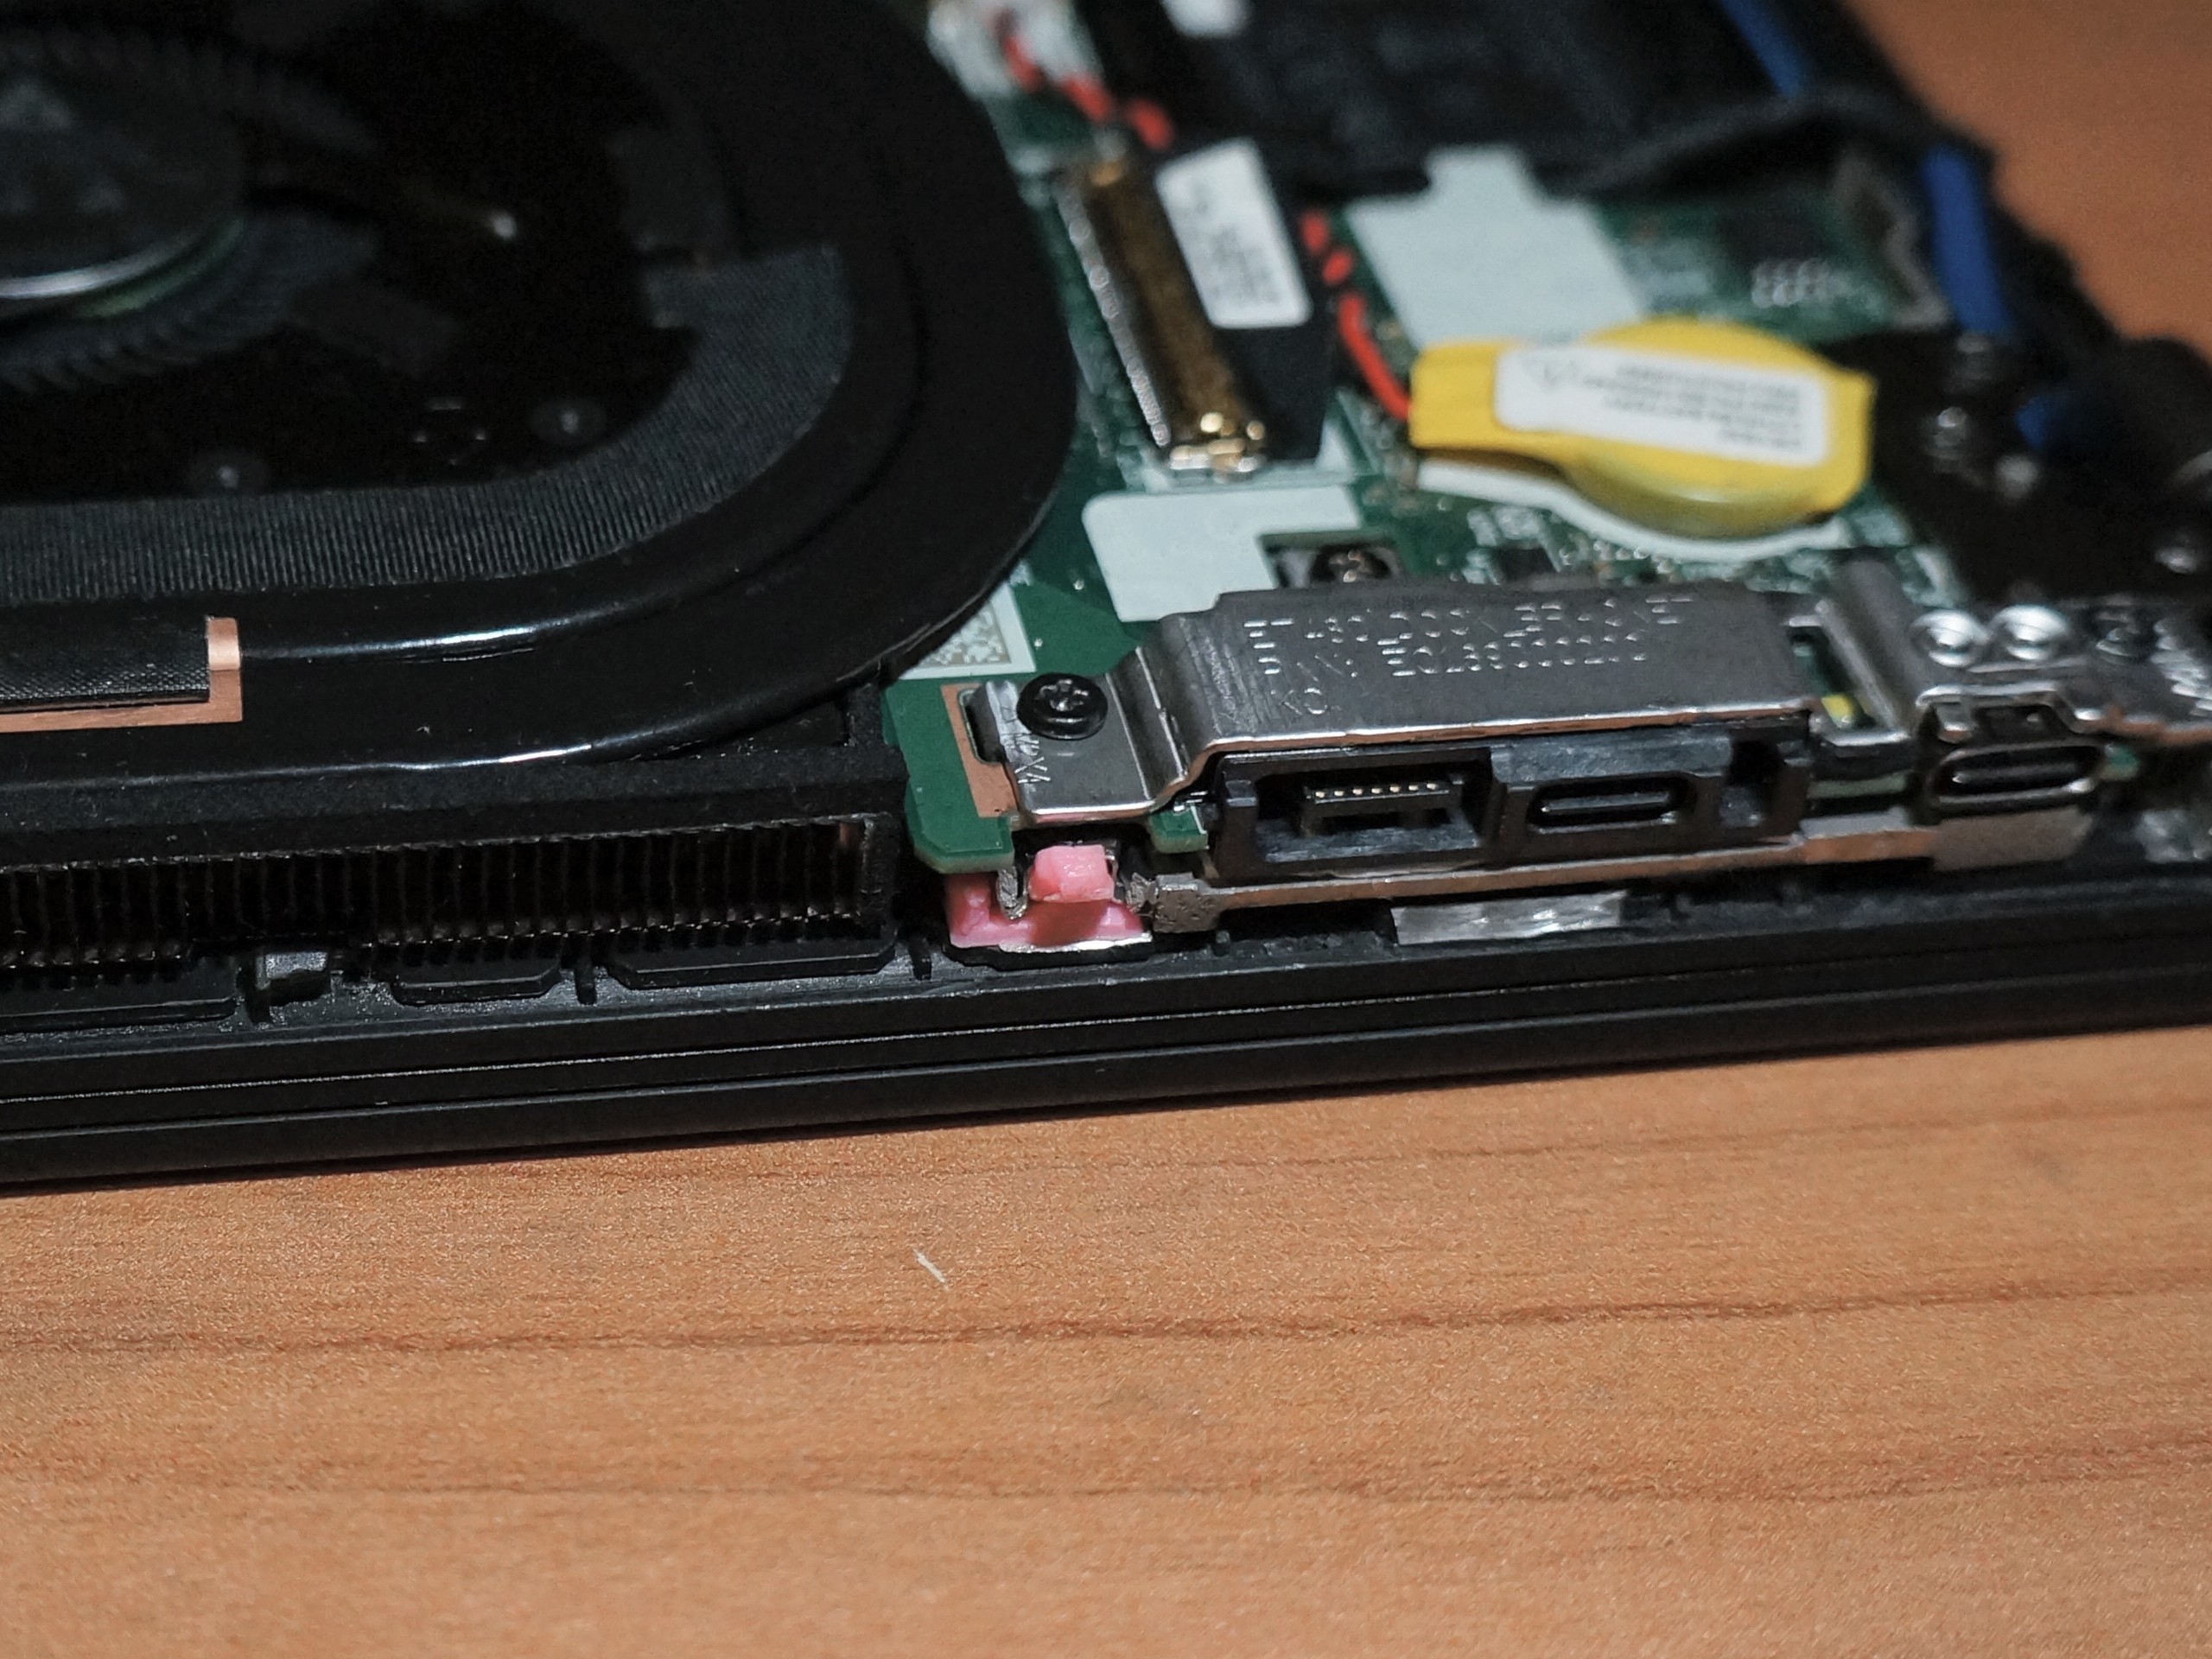
The bottom cover is connected to the top case using clips, which were moved in T480, so the bottom cover won’t be mounted tightly. One of these clips was moved at the place where USB-C was on T25, so it will be a good idea to use its ledge at the top case to mount the clip there (photo 1). You can look at the photos above to understand how to cut this ledge in order to install the clip. Now the bottom cover is mounted pretty tightly (photo 2), although a small 0.5mm gap still remained, and it was easy for me to just not notice it.

Installing the System Board
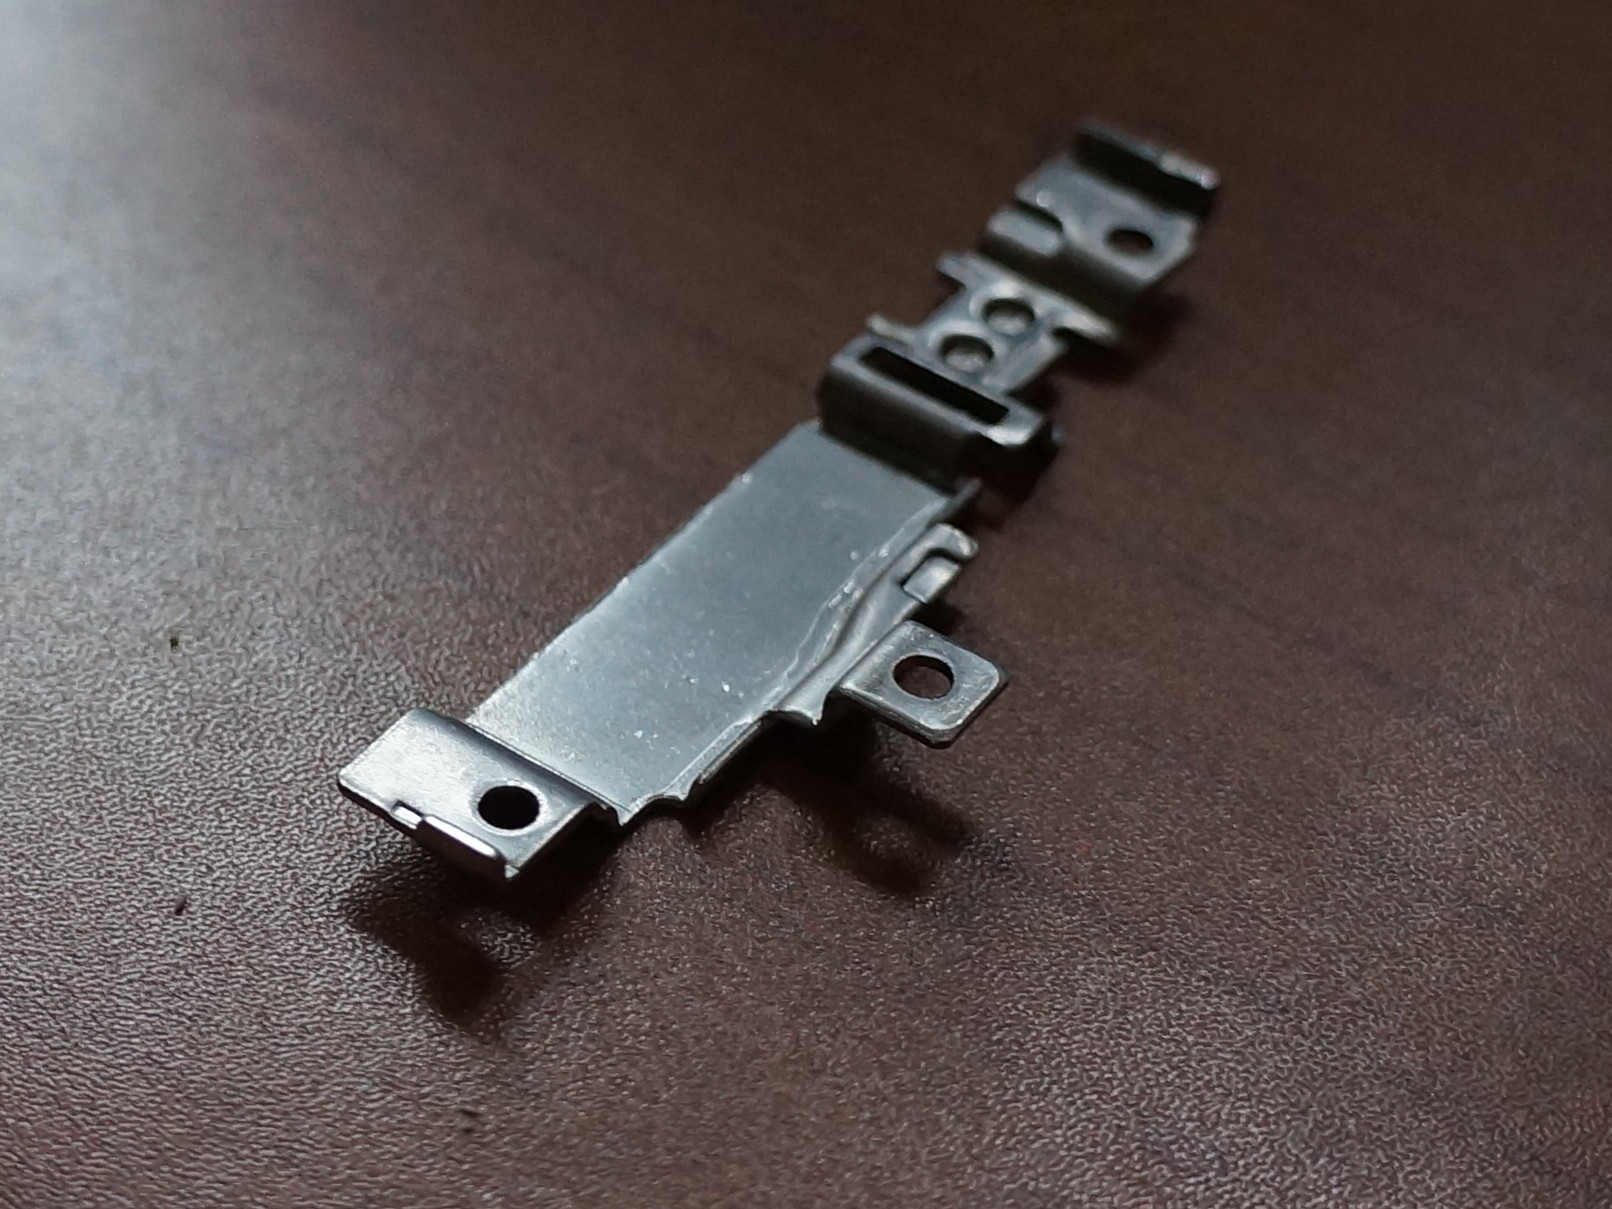
The bracket which fixes the system board doesn’t fit well, so I decided to cut the far corner (photo 1) instead of further torturing the top case. The hinge doesn’t fit as well: it fixed the charging port on T25 which was removed, so it’s a good idea to cut it (photo 2). The hinge’s material is quite sturdy and it took some time to cut it using a dremel. And now it’s possible to just install the system board (photo 3)!

Installing the UHD Panel
The panel I chose has much wider control board, so I had to cut the lid (photo 1) in the bottom. The bezel should be cut as well (photo 2 from partslookup) at the places I marked.

Since this panel doesn’t have mounting holes, I decided to fix the panel using custom brackets I made in CAD which should be installed at the corners. The brackets and the panel are fixed using double-sided tape.
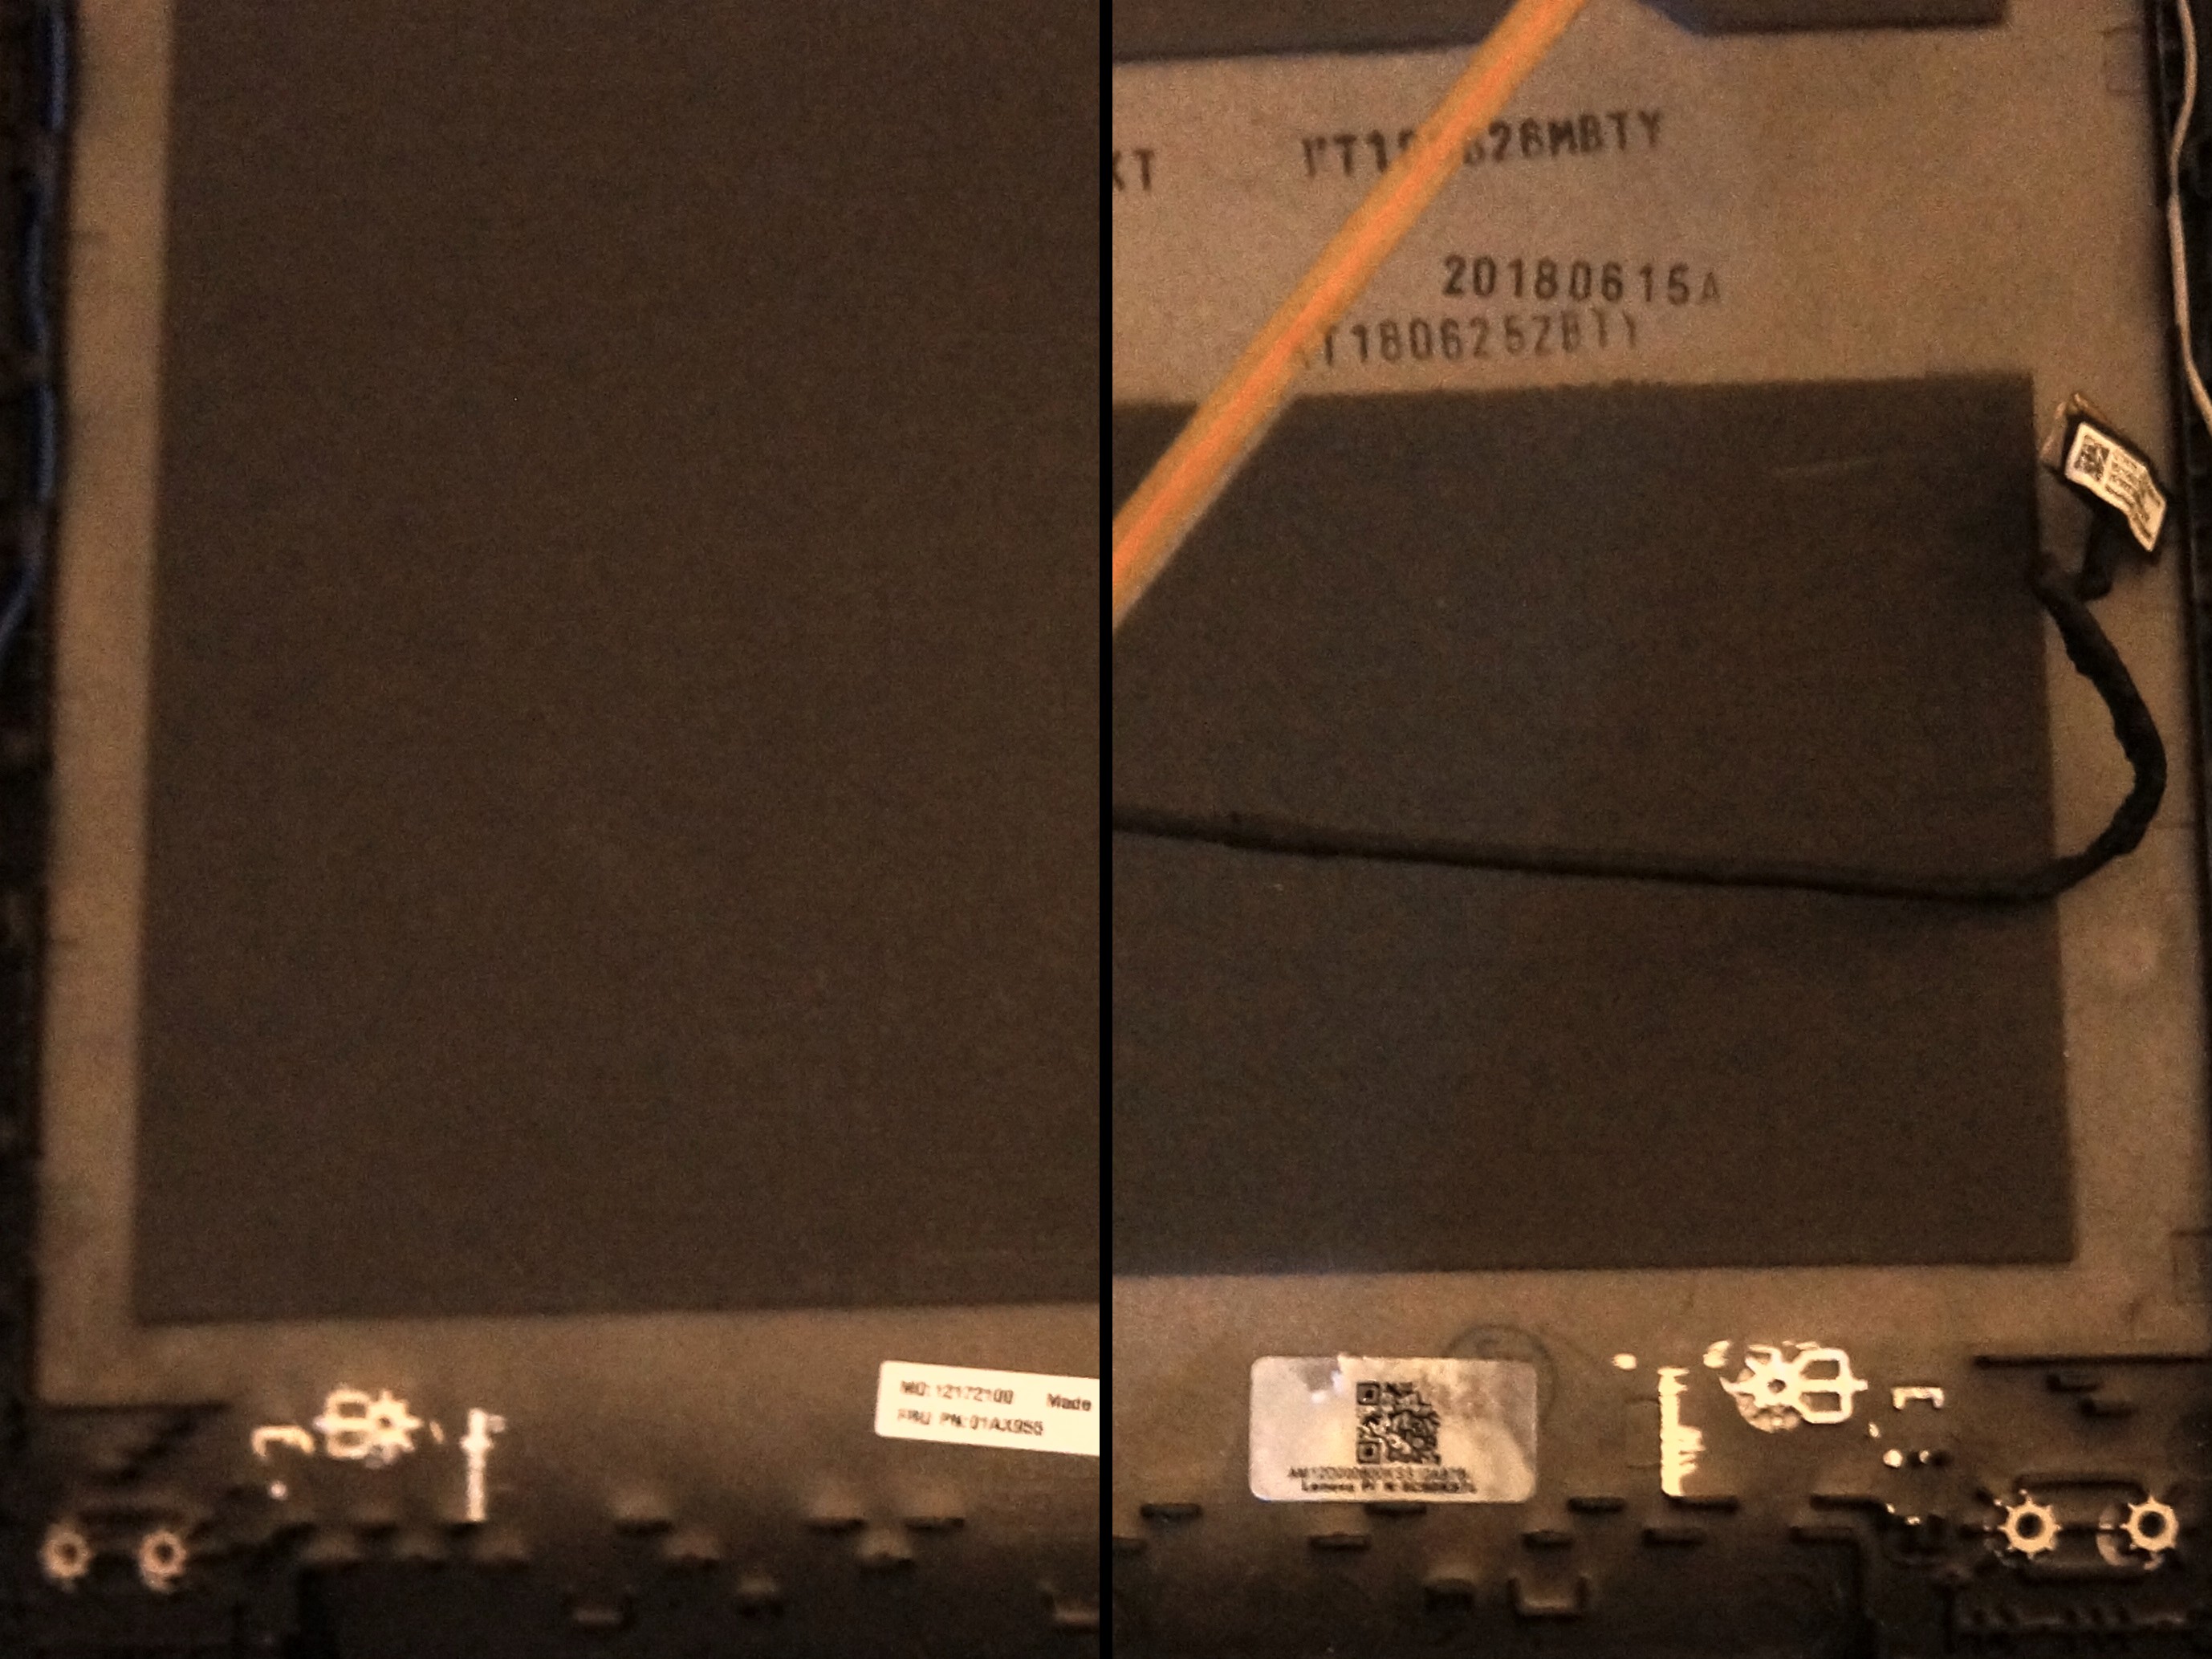
I also made some comparison photos with old FHD touch panel (sorry for this blur):

Fixing the Keyboard Layout
The keyboard doesn’t work well in T480. Some keys are completely dead, the other keys could be remapped. It may be possible to fix the keyboard layout patching EC program, but neither I have reverse engineering skills to do this nor I have an opportunity to bypass Intel Boot Guard (which means that I should connect to EC directly in order to flash EC ROM).
On the other hand, all standard keys work as expected, except for microphone mute button (although, the led on this button works, but pressing the button doesn’t produce any event). Only functional keys broken. I decided to make a custom kernel module which will partially fix the keyboard layout. Here is the table of broken keys:
| Key | T25 | T480 | T480 Fixed |
|---|---|---|---|
| Microphone mute | Microphone mute | Nothing | Nothing |
| Fn + F1 | Nothing | Mute | Microphone mute |
| Fn + F2 | Screen lock | Volume down | Screen lock |
| Fn + F3 | Battery status | Volume up | Battery status |
| Fn + F4 | Suspend | Microphone mute | Suspend |
| Fn + F5 | Touchpad settings | Brightness down | Touchpad settings |
| Fn + F6 | Camera settings | Brightness up | Camera settings |
| Fn + Home | Brightness up | Nothing | Nothing |
| Fn + End | Brightness down | Insert | Nothing |
| Fn + PgUp | Keyboard backlight | Nothing | Nothing |
| Fn + Space | Zoom | Keyboard backlight | Keyboard backlight |
| Fn + Left | Previous track | Home | Brightness down |
| Fn + Right | Next track | End | Brightness up |
| Fn + Up | Stop playback | Nothing | Nothing |
| Fn + Down | Play/pause | Nothing | Nothing |
Microphone mute, Fn + Home, Fn + PgUp, Fn + Up, and Fn + Down are completely dead and I can’t do anything with it. Since Fn + F1 is unused in T25, I decided to remap microphone mute to it. I also moved brightness control to Fn + Left and Fn + Right. Keyboard backlight is toggled by Fn + Space instead of Fn + PgUp by default. Ultimately, only media player control keys and zoom key are lost and some keys work kinda weird. I still think that it’s a good compromise.
The source code and installation instructions are available on my GitHub repo. This driver will work on Linux only.
Conslusion
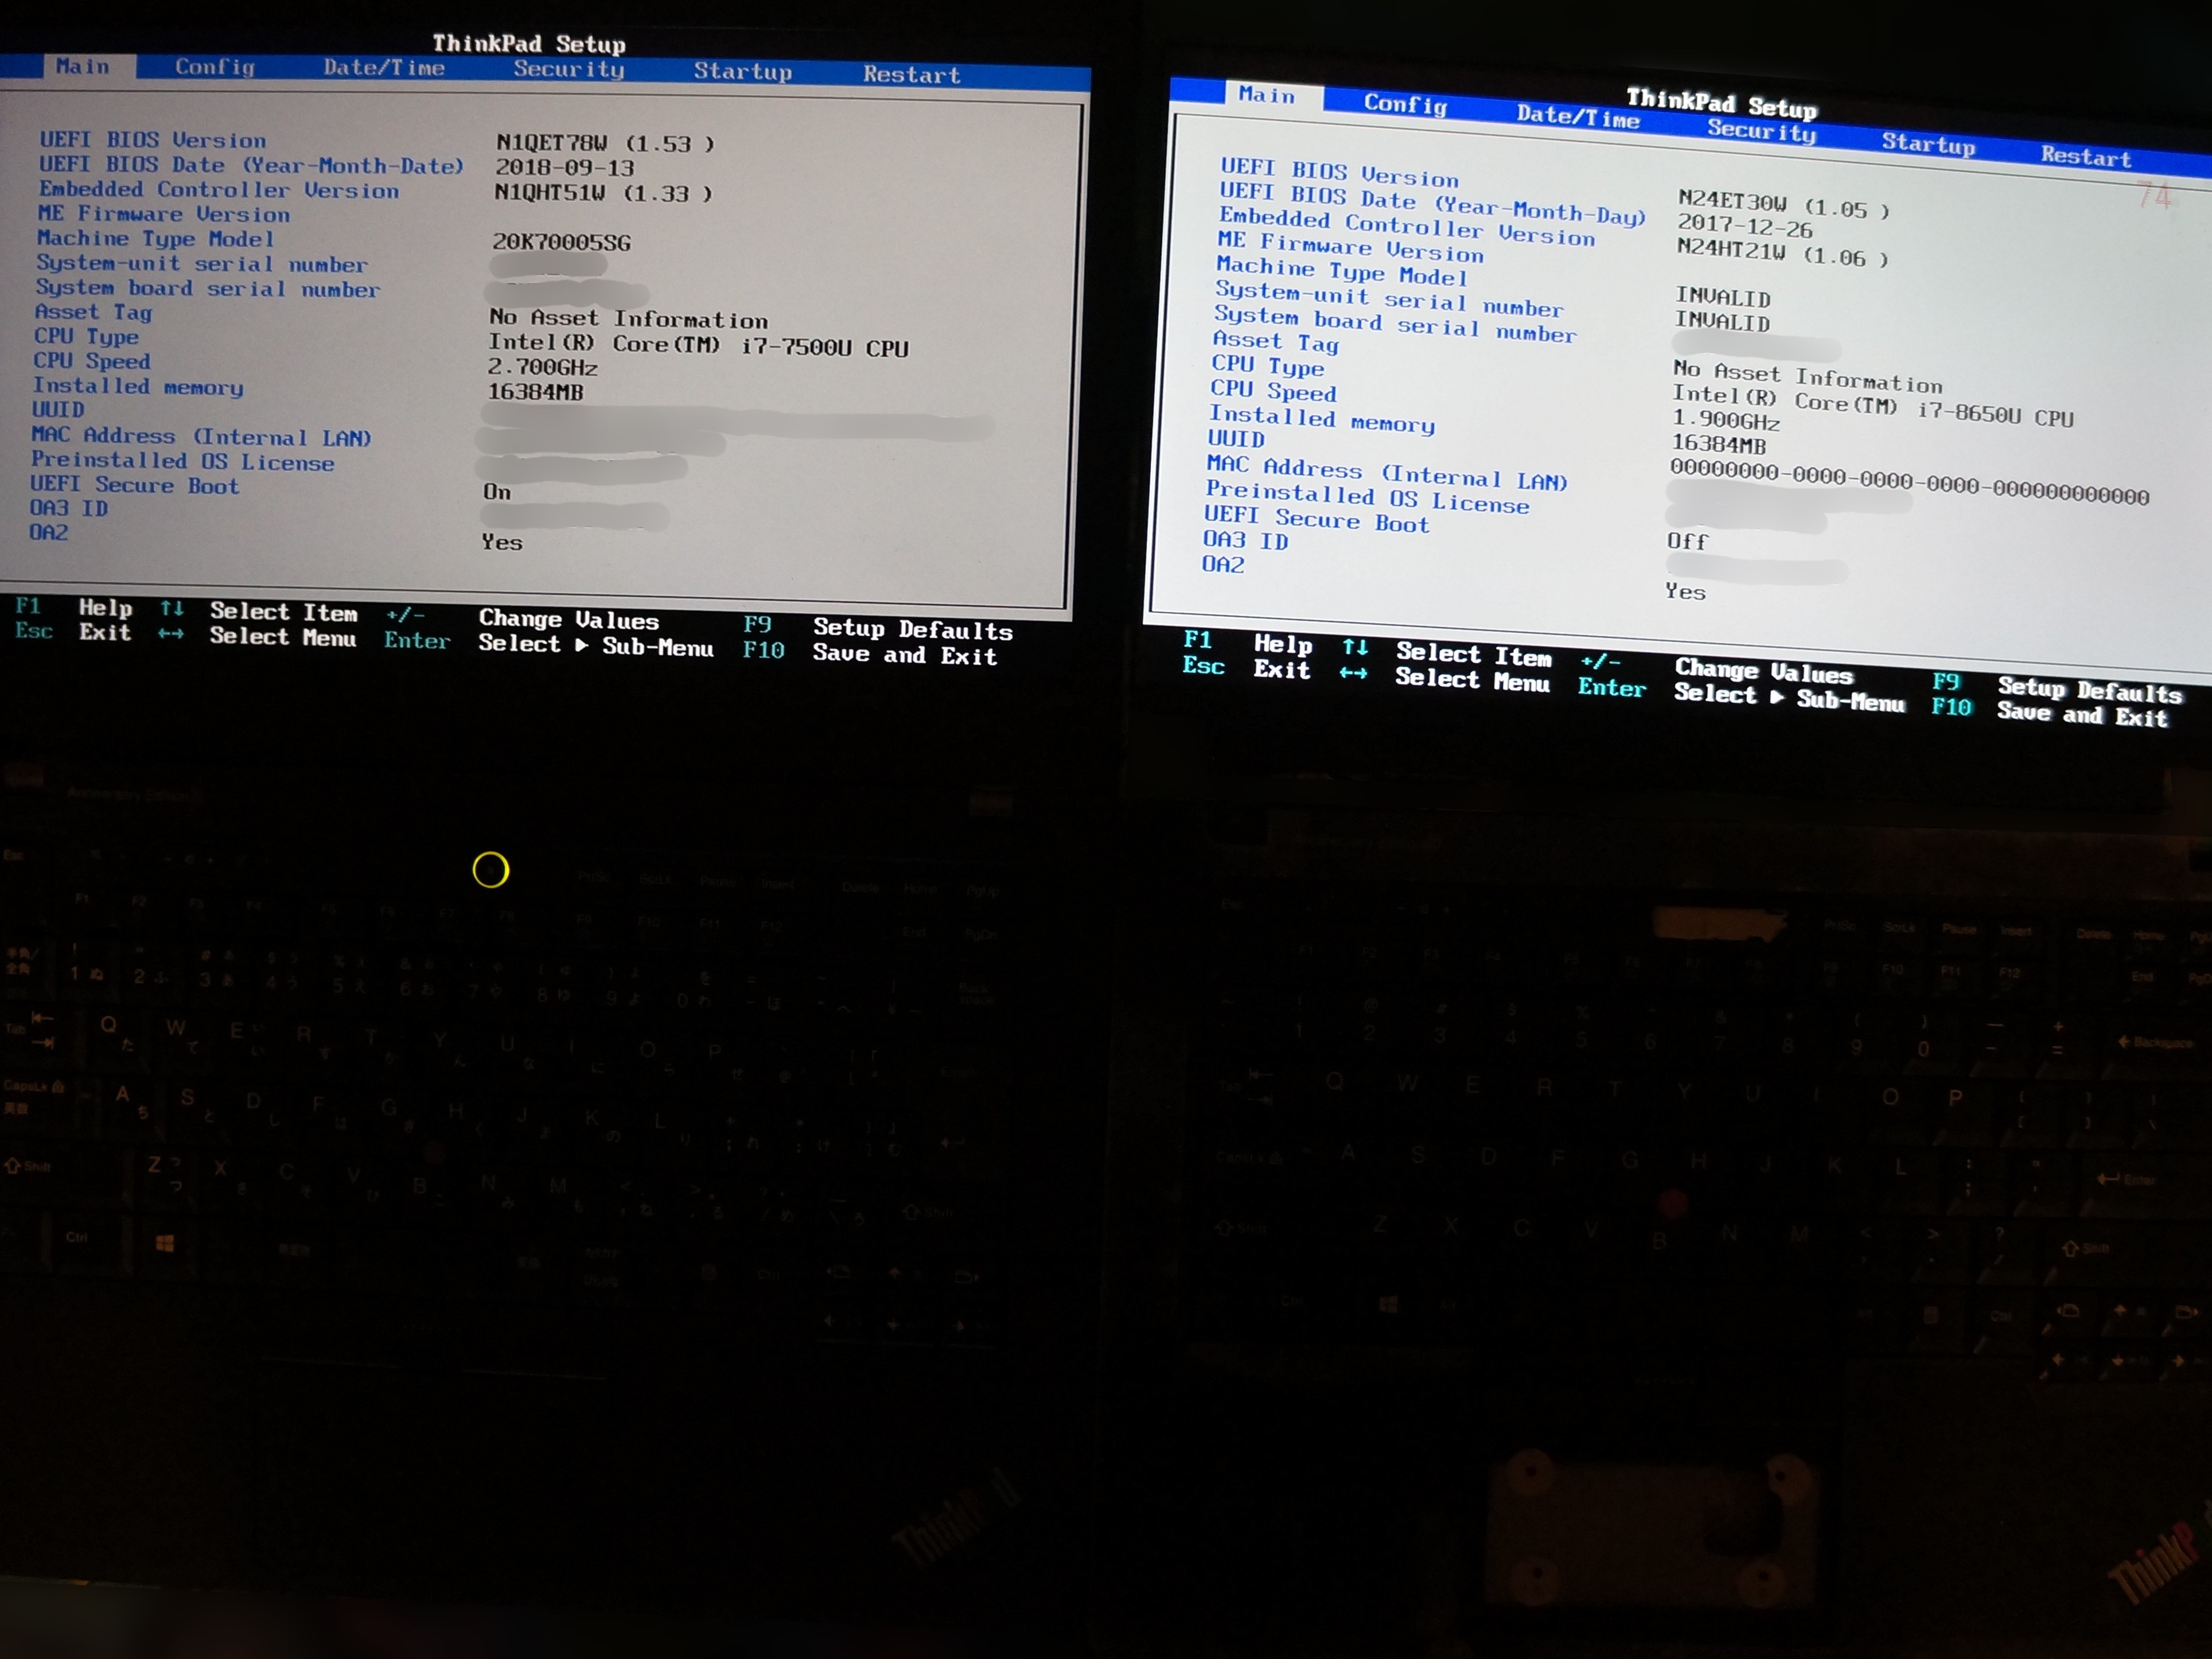
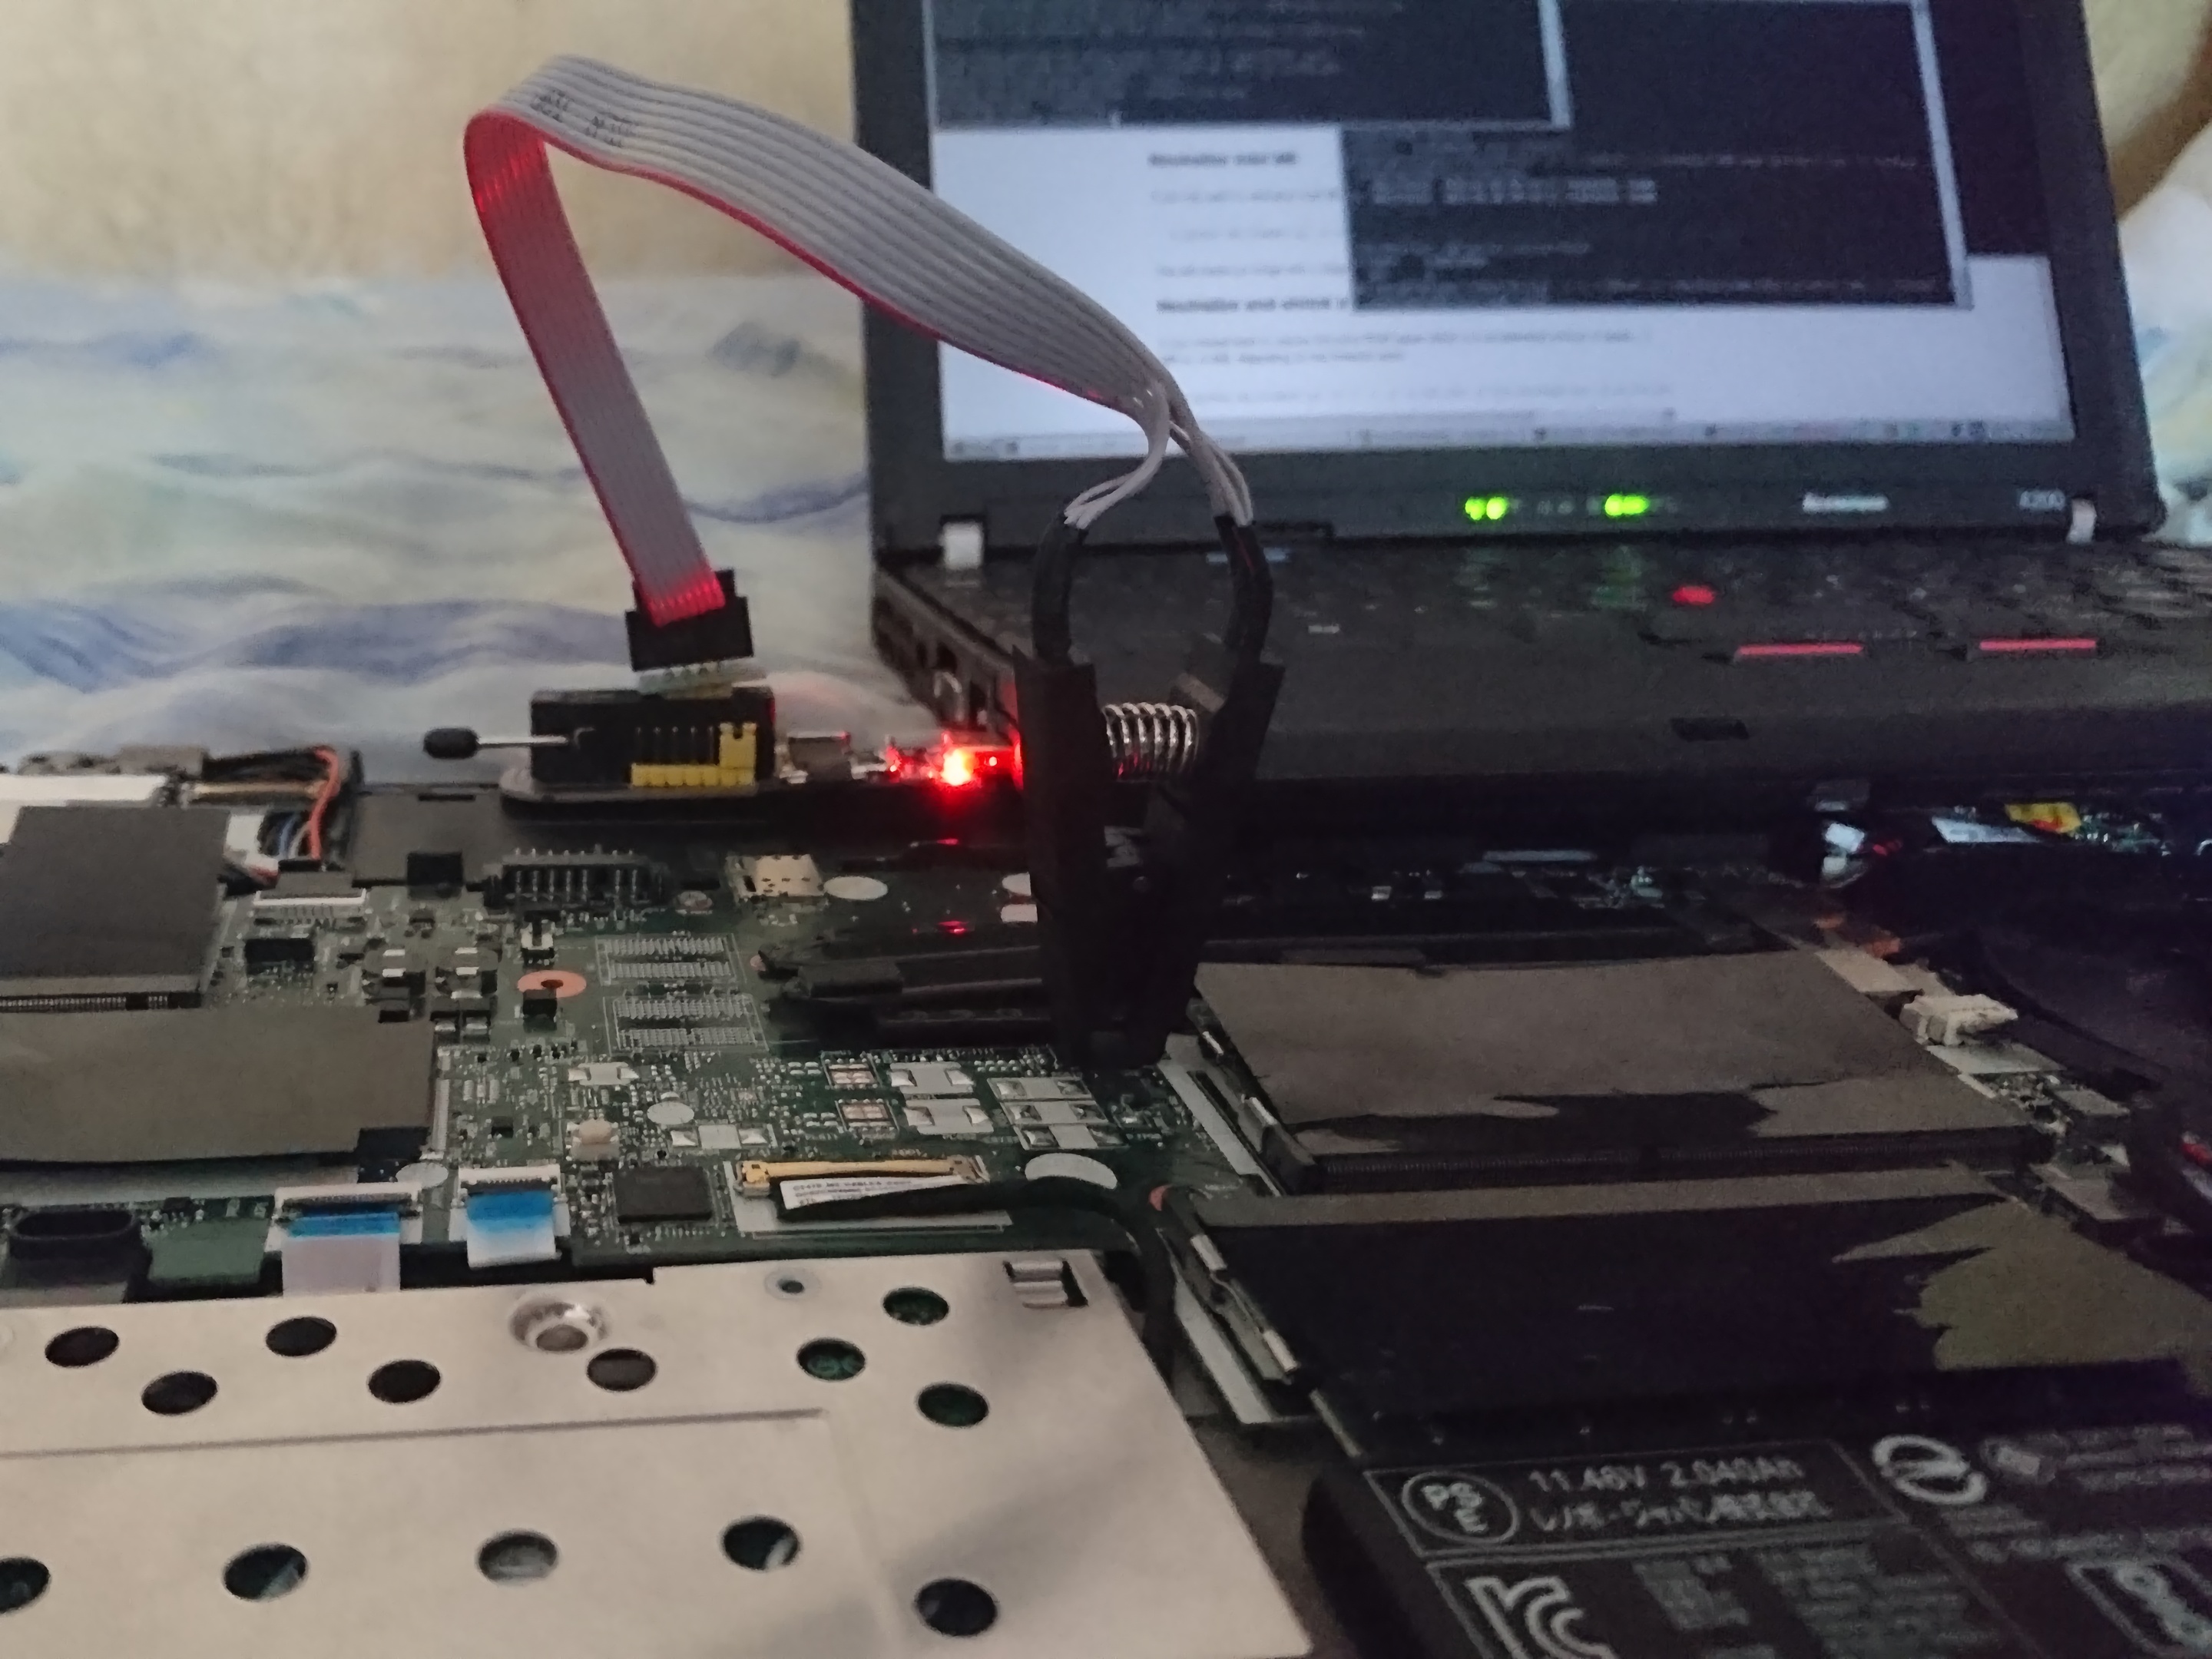
What’s next? The motherboard I bought has very outdated Intel Management Engine firmware
(11.8.50.3425). Its BIOS version was never even released publically (1.05 N24ET30W from
2017/12/26, while the first public version is 1.07 N24UJ01W from 2018/01/31 according to Lenovo
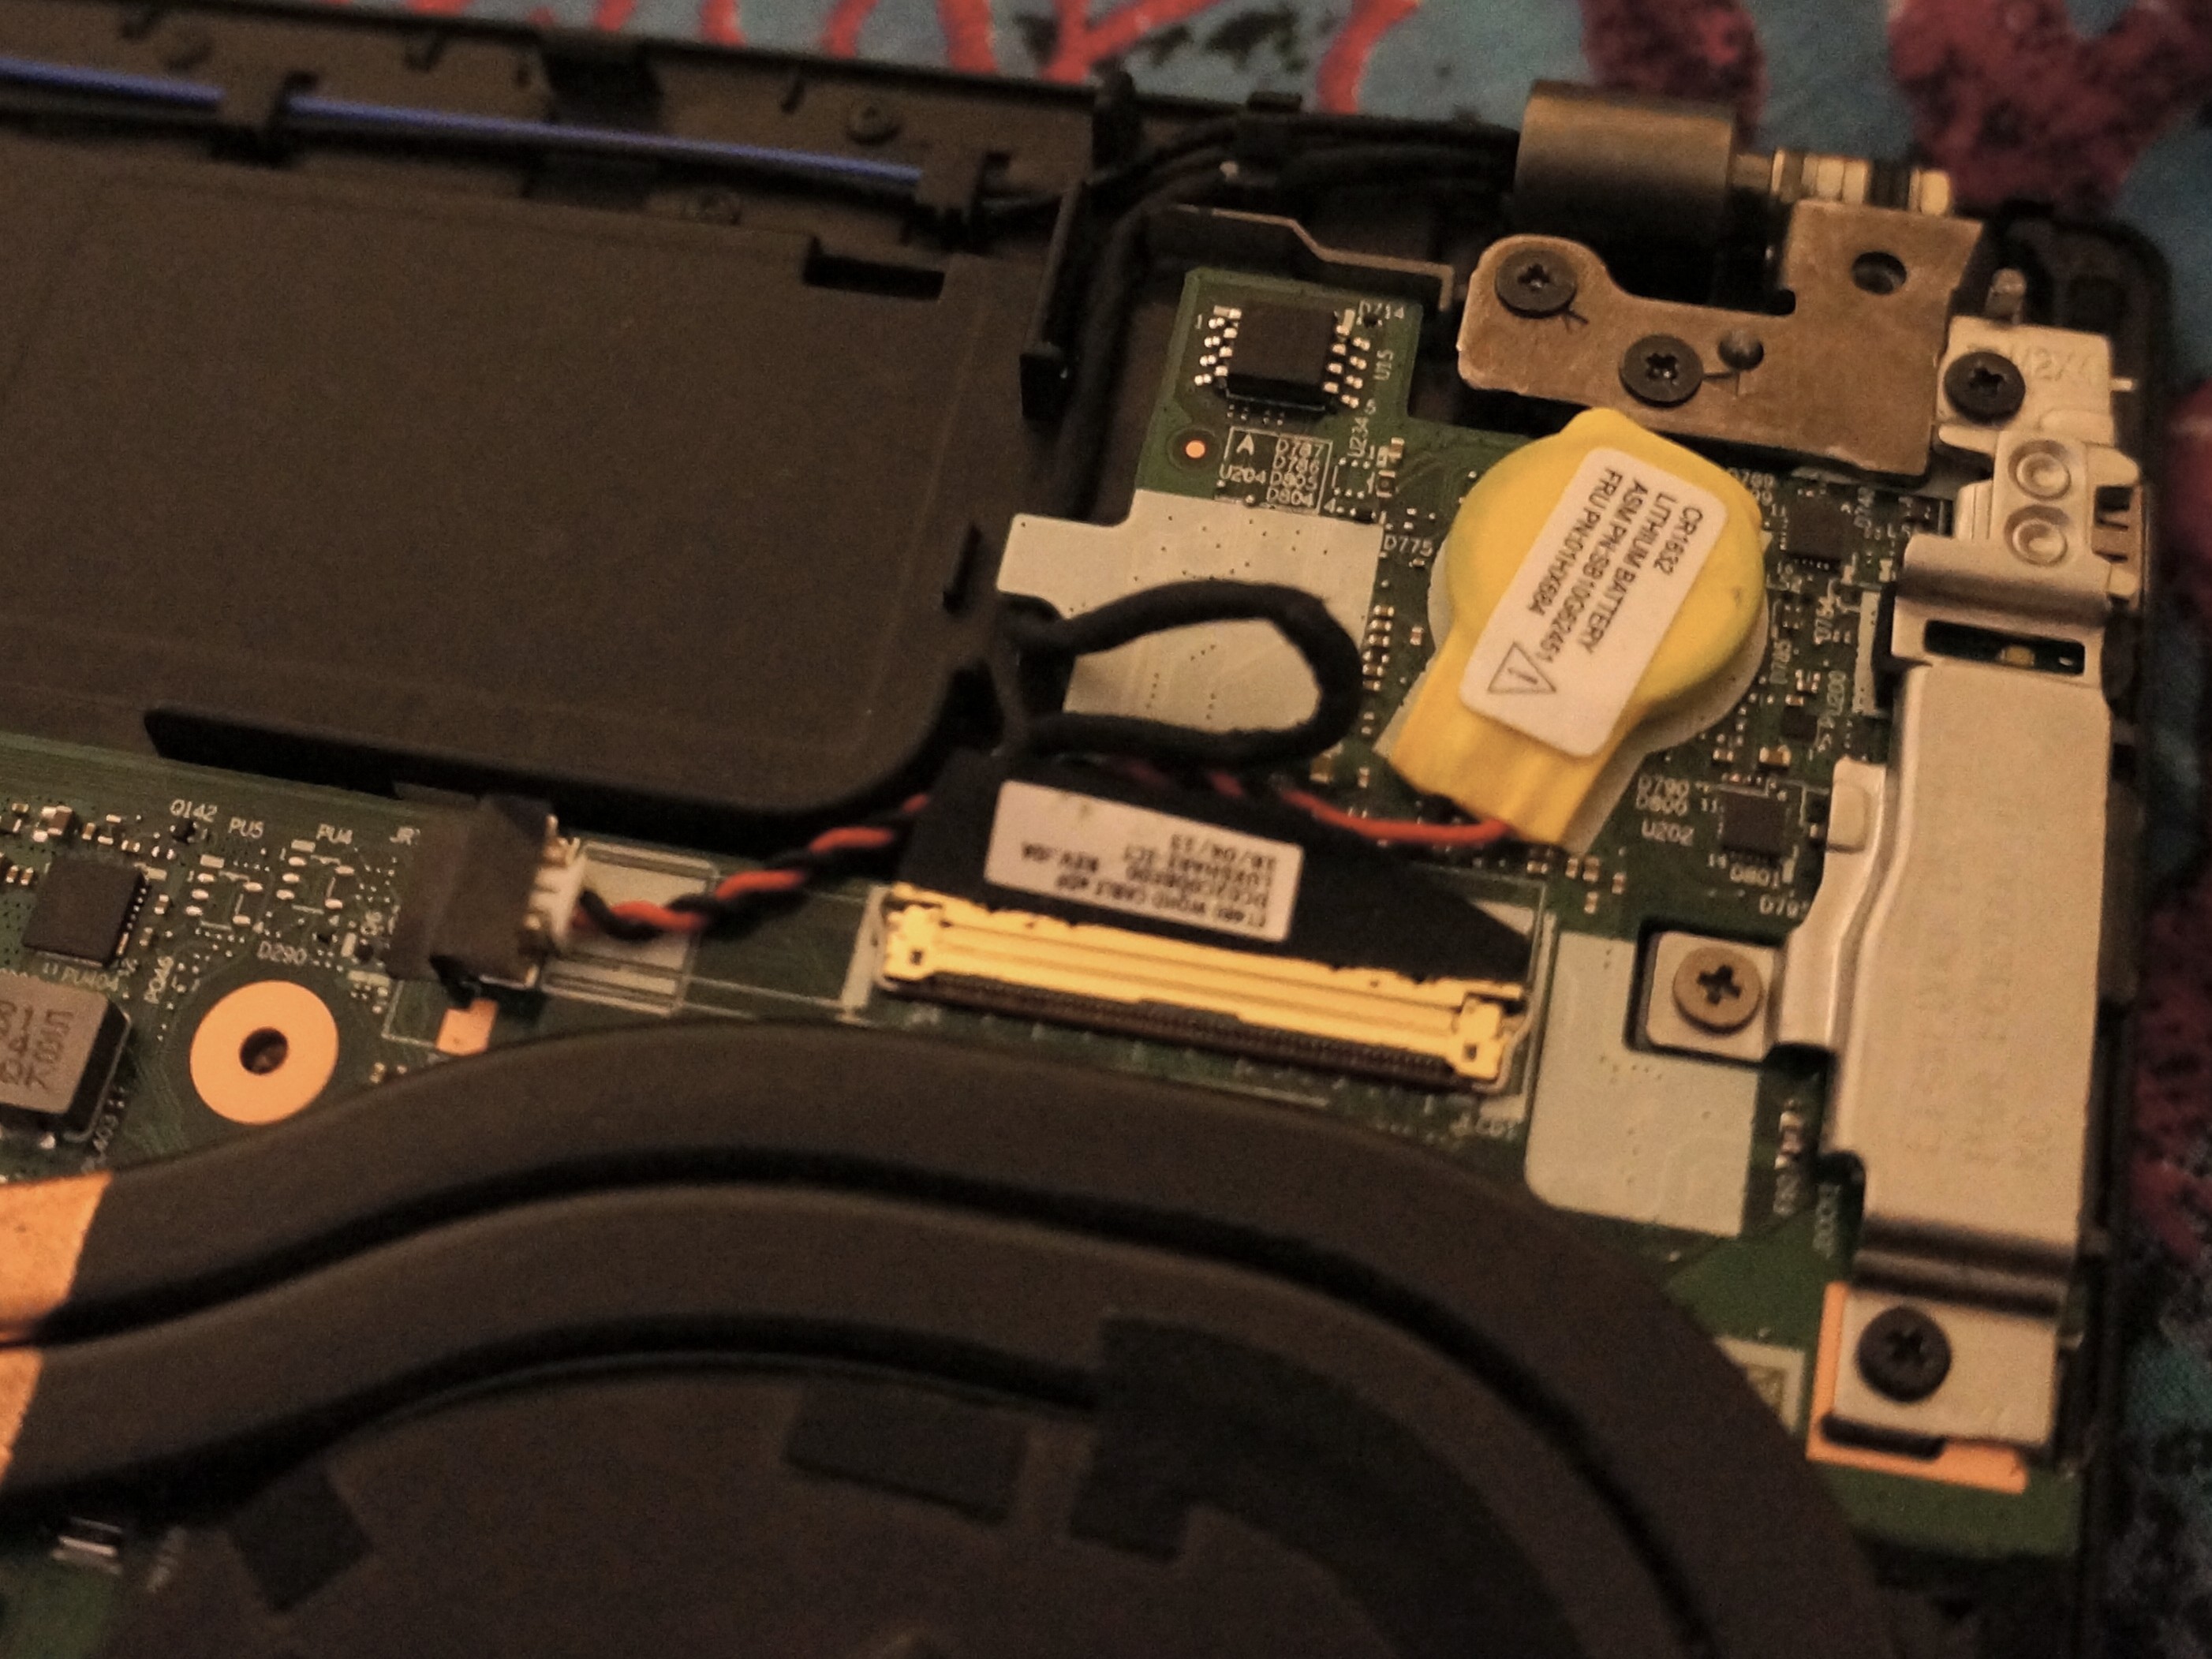
web site). I decided to try to apply me_cleaner (photo 1) and
I succeeded! Everything works just fine: no boot delays, no error messages, no problems at all.
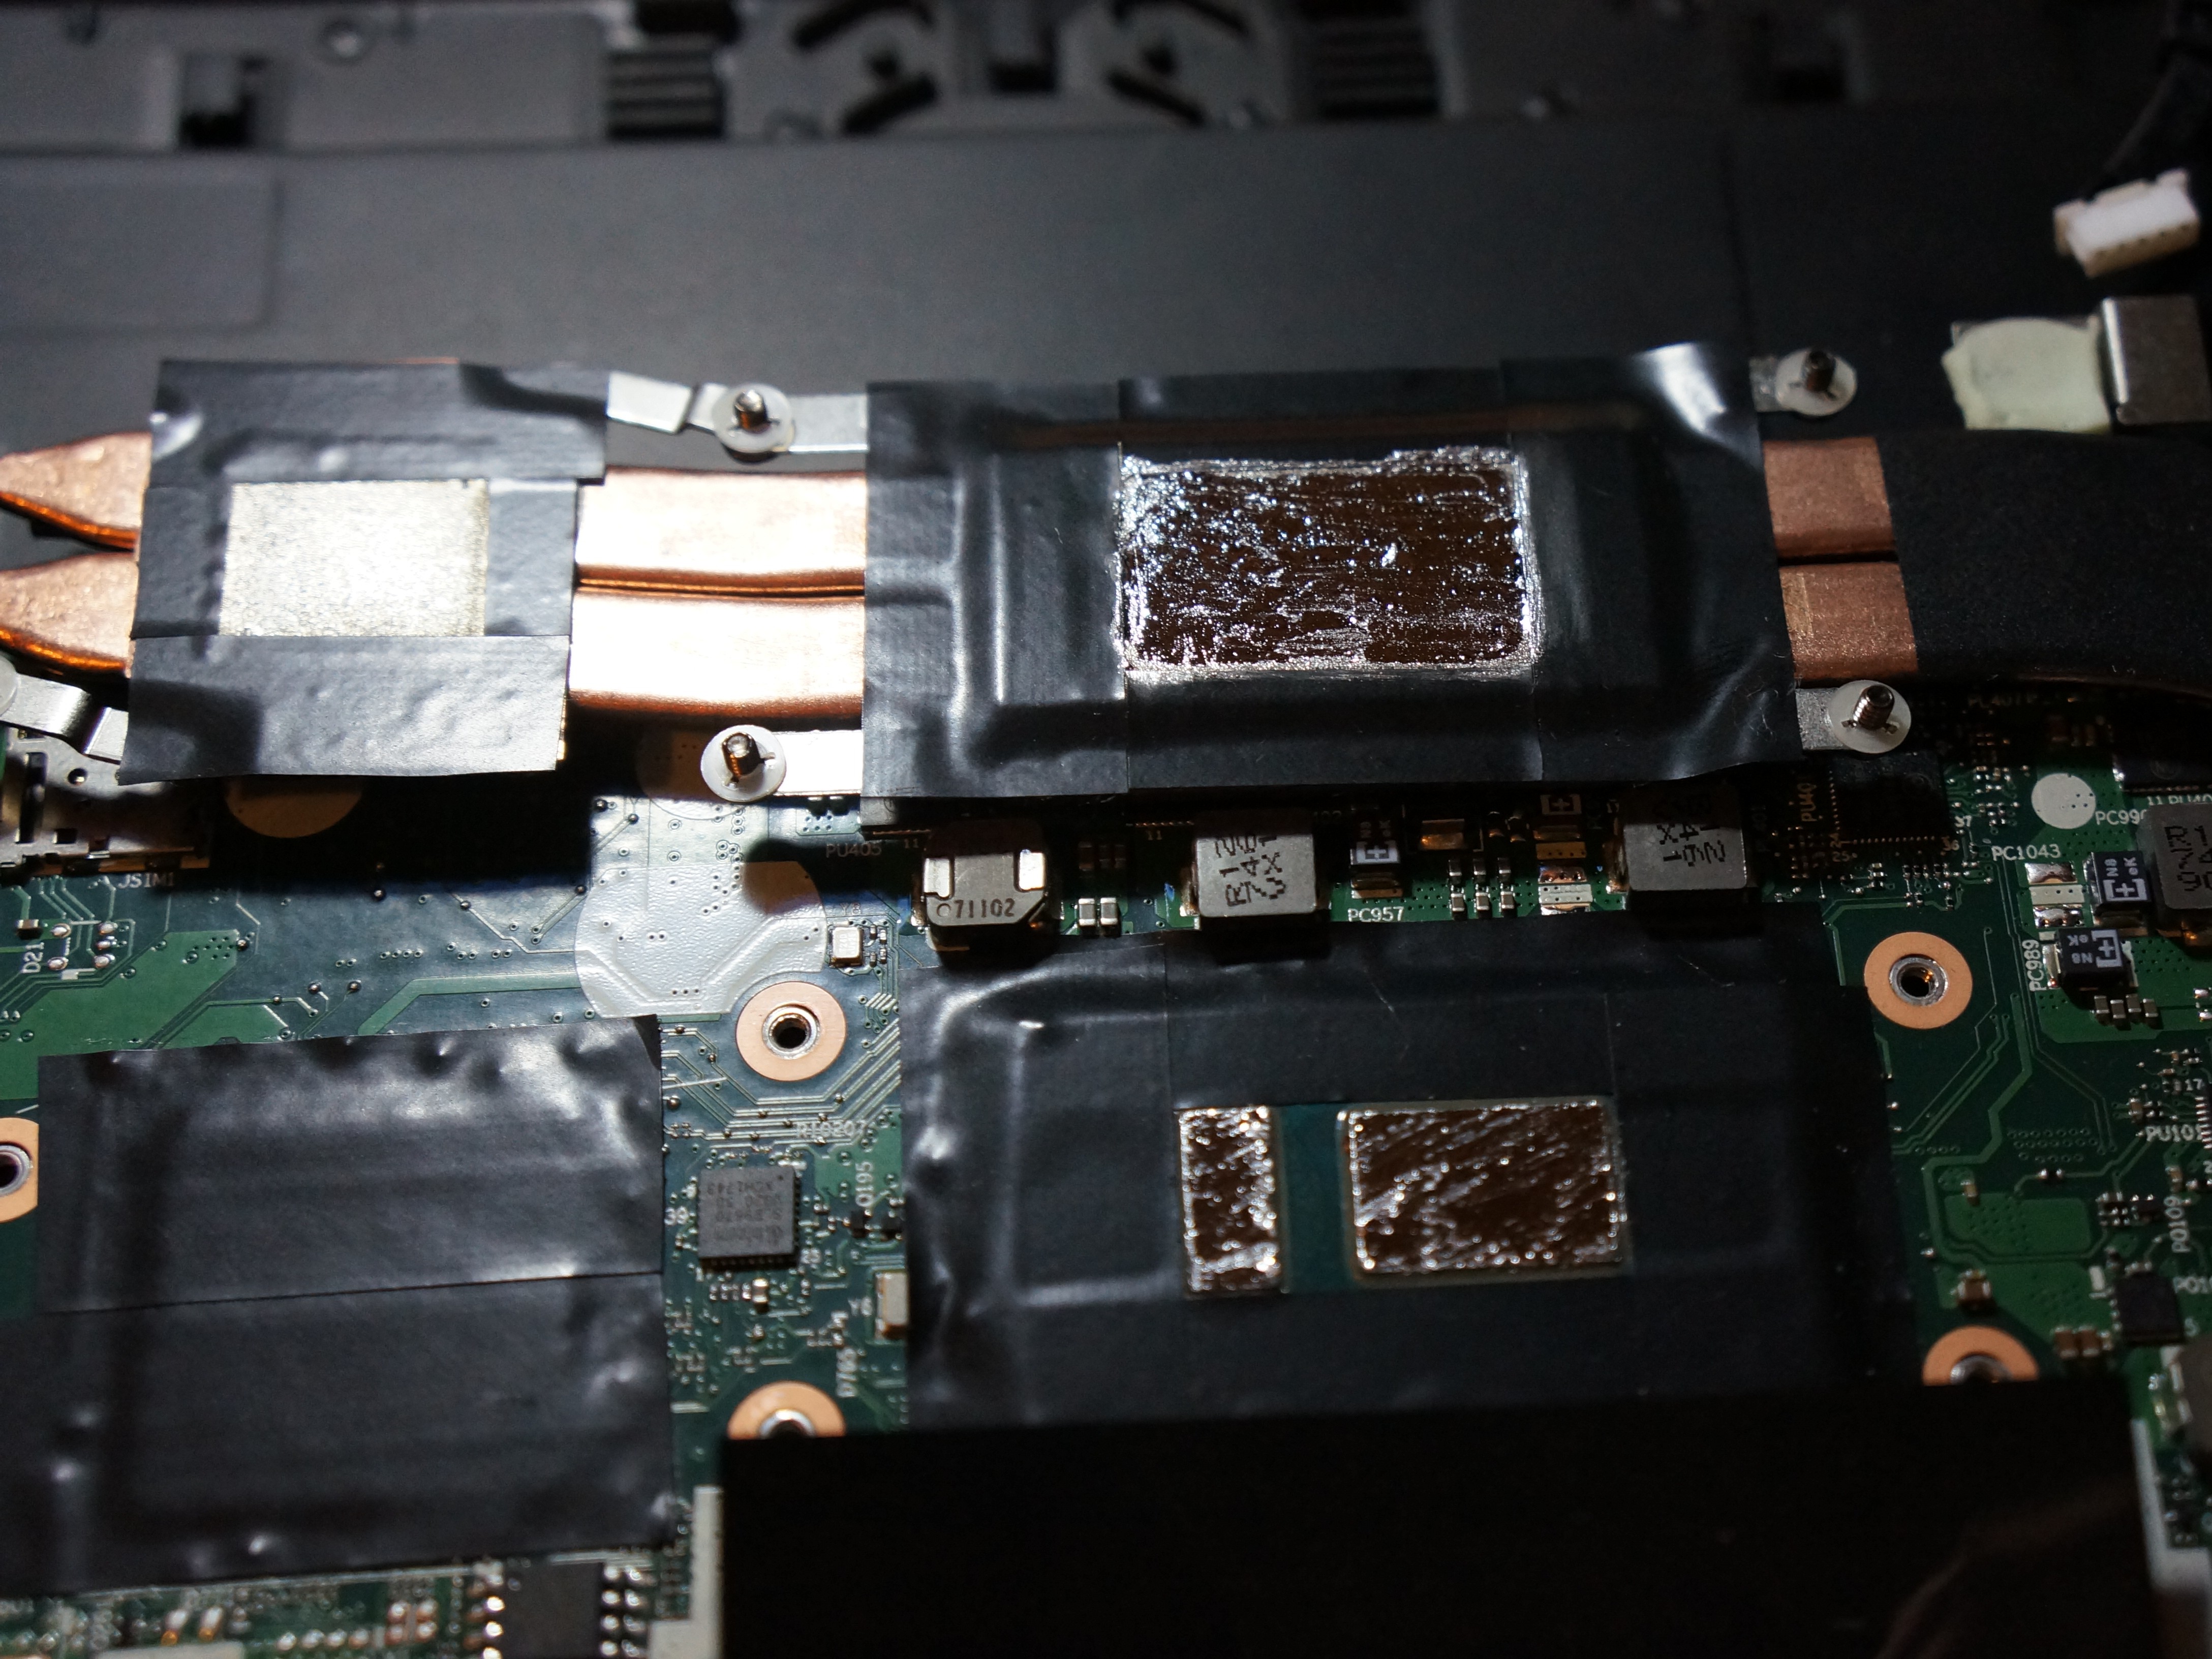
I also applied liquid metal in order to get good thermals and high performance from i7-8650U (photo 2). With undervolting and custom fan speed settings, the frequency of the CPU was about 3.4-3.5 GHz under stress test after 15 minutes. I think it’s a good result for this CPU.
I found a problem with suspending the machine. After doing this, the trackpoint and touchpad didn’t work until next cold boot (reboot didn’t fix the issue). Apparently, it’s a hardware incompatibility issue: just don’t turn off NFC in setup and suspending will work fine.
Before doing any updades, my T25 weighed 1.71kg. Replacing the lid significantly reduced the weight to 1.614kg. And after replacing the system board and bottom cover my notebook weighs 1.559kg! My notebook dropped ~0.15kg in weight or became ~10% lighter, which is surprising and impressive difference to me.
So, the idiot’s dream has come true. Now I have a really modern powerful machine with quad-core CPU and good LCD panel, which I’m going to use for years. It took a significant amount of time and money, of course, but I’m really happy with the result.
Thanks for reading!